


69
GB
Troubleshooting
Symptom
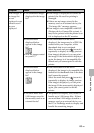
The image
cannot be
printed fully in
the print range.
Even if
“Borders” is set
to “No”, the
image is printed
with borders on
both sides.
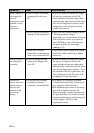
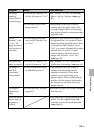
Only part of an
image is printed.
The image is
stretched
horizontally
when printed.
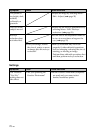
The image is
printed at an
angle.
There are white
lines or dots on
the printed
pictures.
Cause/Solutions
cSet “Borders” to “No” by selecting
Menu - Set Up - Borders. (.page
42)
cDepending on the type of digital
camera used, the aspect ratio of the
recorded image differs, so the image
may not be printed covering the entire
printable area.
c
When you edit and save an image in
the postcard size, it is saved as a print
image including the blank areas. Even
if you print it with “Borders” set to
“No”, you cannot eliminate the borders
on both sides of a print. To print
without borders, edit and save an
image with “Borders” set to “No”.
(.page 42)
cSet “Borders” to “Yes” to print the
whole area of an image. (
.
page 42)
cDepending on the type of digital
camera used, the image may be
stretched vertically if it has been
rotated or processed using your
digital camera. This is not because of
trouble with the printer, but because
the image was rewritten with your
digital camera.
cRe-insert the paper tray firmly straight
in to the end.
cThe print head or paper path may be
soiled. Use the supplied cleaning
cartridge to clean the head and path.
(.page 80)
Check
• Did you set “Borders” in
the Set Up menu to “Yes”?
• Is the aspect ratio of the
image correct?
• Is the image edited and
saved with “Borders” set
to “Yes”?
•
Did you set “Borders” in
the Set Up menu to “Yes”?
• Did you rotate the image
or add other process?
• Is the paper tray inserted
properly?