


Network Print Monitor
4 6 - 4
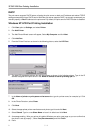
15. Select the Network Print Port and click OK.
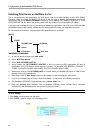
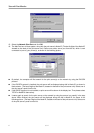
16. The Add Port box will then appear, along with the print server’s Node ID (The last 6 digits of the Node ID,
located on the back of the print server unit). Select one printer server port from the list, which is now
connected to (one of) your printer(s), as shown in the following picture.
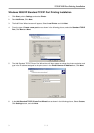
By default, the computer will first search for the print server(s) on the network by using the IPX/SPX
protocol.
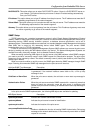
If the IPX/SPX protocol is installed, the print server will be displayed along with its Node ID, as shown in
Node column. (The last 6 digits of the Node ID, located on the back of the print server unit). Select one of
the print server’s ports from the list.
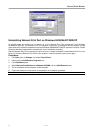
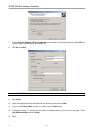
If the IPX/SPX protocol is not installed, no print server will be shown in the display box. Then please select
TCP/IP or NetBEUI alternatively.
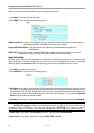
It starts again to search for the print server on the network by using the protocol you specify in the step
above. When finished, the print server will be displayed along with the its Node ID, as shown in the
following picture. (The last 6 digits of the Node ID, located on the back of the print server unit). Select one
of the print server’s ports from the list.