


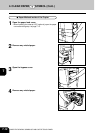

1
2
3
4
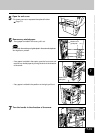
5
6
7
8
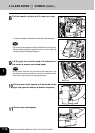
9
10
11
12
7-9
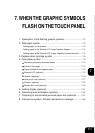
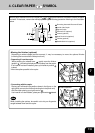
4. CLEAR PAPER SYMBOL
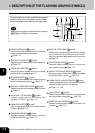
Reversing Automatic Document Feeder
Inside of the Copier
Bypass Guide
External LCF (optional)
Inserter (optional)
Hole Punch Unit (optional)
Finisher (optional)
Saddle Stitch Unit (optional)
When a paper misfeed occurs in the copier,the or symbol flashes in the positions where the paper
is misfed. In that case, remove the misfed paper using the following procedure referring to the illustration
below.
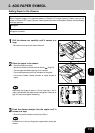
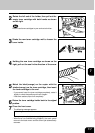
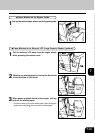
- Moving the finisher (optional)
Depending on where a paper jam has occurred, it may be necessary to move the optional finisher.
( including the inserter and the hole punch unit.)
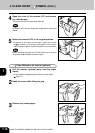
- Separating it from the copier
While pressing the release lever
, gently move the finisher
(position
A
) (including the hole punch unit) away from the copier.
If an inserter has been installed, place your hands in position
B
instead.
* Move the options parallel to the copier.
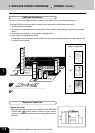
- Connecting with the copier
Placing your left hand in the position shown in the figure on the
right, gently connect the finisher(including the hole punch unit)
with the copier placing your right hand on
C .
If an inserter is to be installed, place your right hand on
D instead.
When installing the options, be careful not to let your fingers be
caught between them and the copier.
1
BA
D
C
Left hand’s position