


FOR MACINTOSH USERS: When the UMAX VistaScan window opens on your desktop, double-
click on the UMAX CD Installer icon to begin the software installation.
2. Follow the onscreen instructions to complete the installation of Presto! PageManager, UMAX
VistaScan, OmniPage LE, and the online User’s Guide.
3. Restart your computer as suggested by the onscreen instructions to complete the installation.
Installing the Hardware
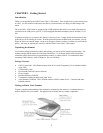
After you have removed the scanner from the box and verified that all of the package contents have been
included, please check to make sure that your computer is compatible with the scanner’s connectors.
About Scanner Connectors
USB Connectors
Many newer computers, both PC and Macintosh, rely on USB technology as the primary method of
communication between the computer and its peripherals. With this new USB “plug-and-play” technology
your computer automatically configures peripherals. If your computer has a USB port, you must make sure
that this port is enabled in the system BIOS. Please refer to the troubleshooting section to learn more about
enabling the USB Port.
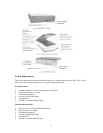
Checking Your Computer’s Connectors
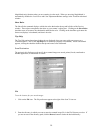
To use your scanner you need to understand what type of connectors you have on your computer. To
determine the connector type, look at the back panel of your computer.
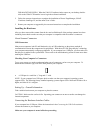
• A USB port is a small slot ½” long and ¼” wide.
NOTE: If your computer has a USB port, check to make sure that your computer’s operating system
supports USB. The following factory-installed operating systems support USB: Microsoft Windows 98 or
higher, and Mac OS 8.1 or higher.
Setting Up – General Information
Find a suitable location near your computer to place the scanner.
CAUTION: Make sure the surface is flat. Operating your scanner on an uneven surface can damage the
internal components.
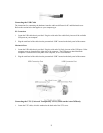
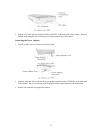
Connecting the Hardware Interface Cables
If your computer has a USB port, follow the instructions in the Connecting the USB Cable section to
connect the scanner to your computer.
Make sure your computer is turned off before proceeding.
7