ADJUSTING THE IMAGE ON THE ADVANCED INTERFACE 89
To manually set the image size:
1. To scan at one of the preset input sizes, select the image size from
the menu.
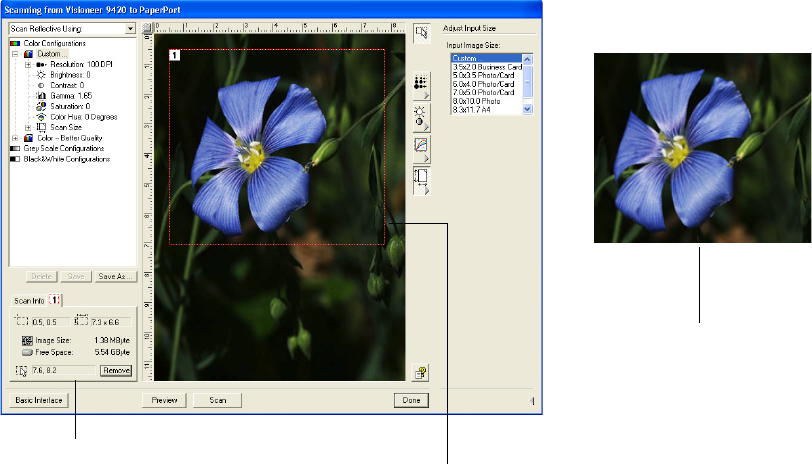
To scan a specific area of the image, click on the image and drag a
box around the area you want.
The dotted outline shows the selected area in the image.
The following figure shows an example of a manually selected area.
Note that the selected area in the example has the number “1” in its
upper left corner indicating it is your first selected area. You can
select up to six separate areas on an image at a time.
You can now move or resize the outline to select the specific area
you want to scan.
2. To move the dotted outline, put the pointer in the selected area and
drag the mouse.
The Scan Info box shows the size
and position of the area.
The selected scan area.
This is the image that appears
on the PaperPort desktop
when scanning is finished.
