WD ELEMENTS PLAY MULTIMEDIA DRIVE
USER MANUAL
GETTING STARTED – 12
Step 2 - Loading Content On Your Multimedia Drive
Transfer your favorite content from your computer to your multimedia drive. You can
also transfer files from your multimedia drive to your computer.
Windows
1. Turn on your computer.
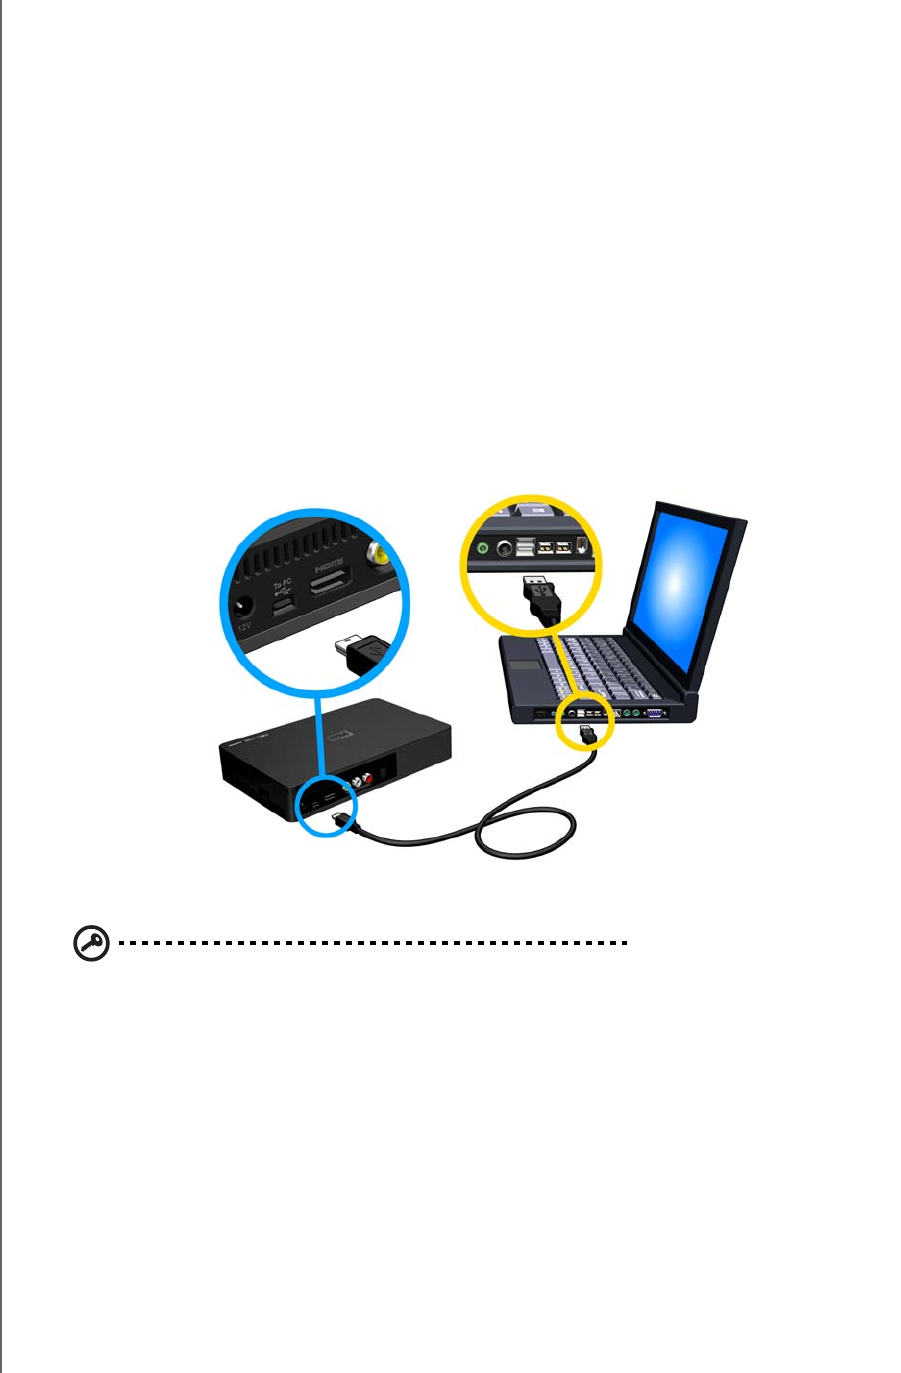
2. Connect the drive’s power cable (see “Step 1 - Connecting the Power Cable” on
page 11) and USB cable as shown below.
3. Drive utilities are installed automatically. If a security alert is displayed during this
installation, click Accept or Continue.
4. The multimedia drive appears as a new drive volume in Computer (Windows 7
or Windows Vista) or My Computer (Windows XP).
5. Drag and drop your media files from your computer to the multimedia drive or
from the multimedia drive to your computer.
6. When finished, right-click the Safely Remove Hardware icon in your system tray
and select Safely Remove Hardware.
Macintosh
Important: To transfer content to or from the multimedia drive using a Mac,
you must reformat the drive. See “Multimedia Drive Reformatting” on page
10 for details.
1. Turn on your computer.
2. Connect the drive’s power cable (see “Step 1 - Connecting the Power Cable” on
page 11) and USB cable as shown below.
3. The drive mounts to the desktop and a WD Multimedia icon appears.
Double-click the WD Multimedia drive icon.
4. Drag and drop your media files from your computer to the multimedia drive or
from the multimedia drive to your computer.
5. When finished, drag the WD Elements Play icon to the Trash icon for proper
dismount.
