


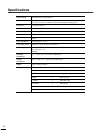
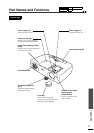

Part Names and Functions
58
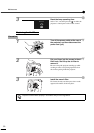
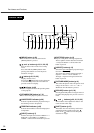
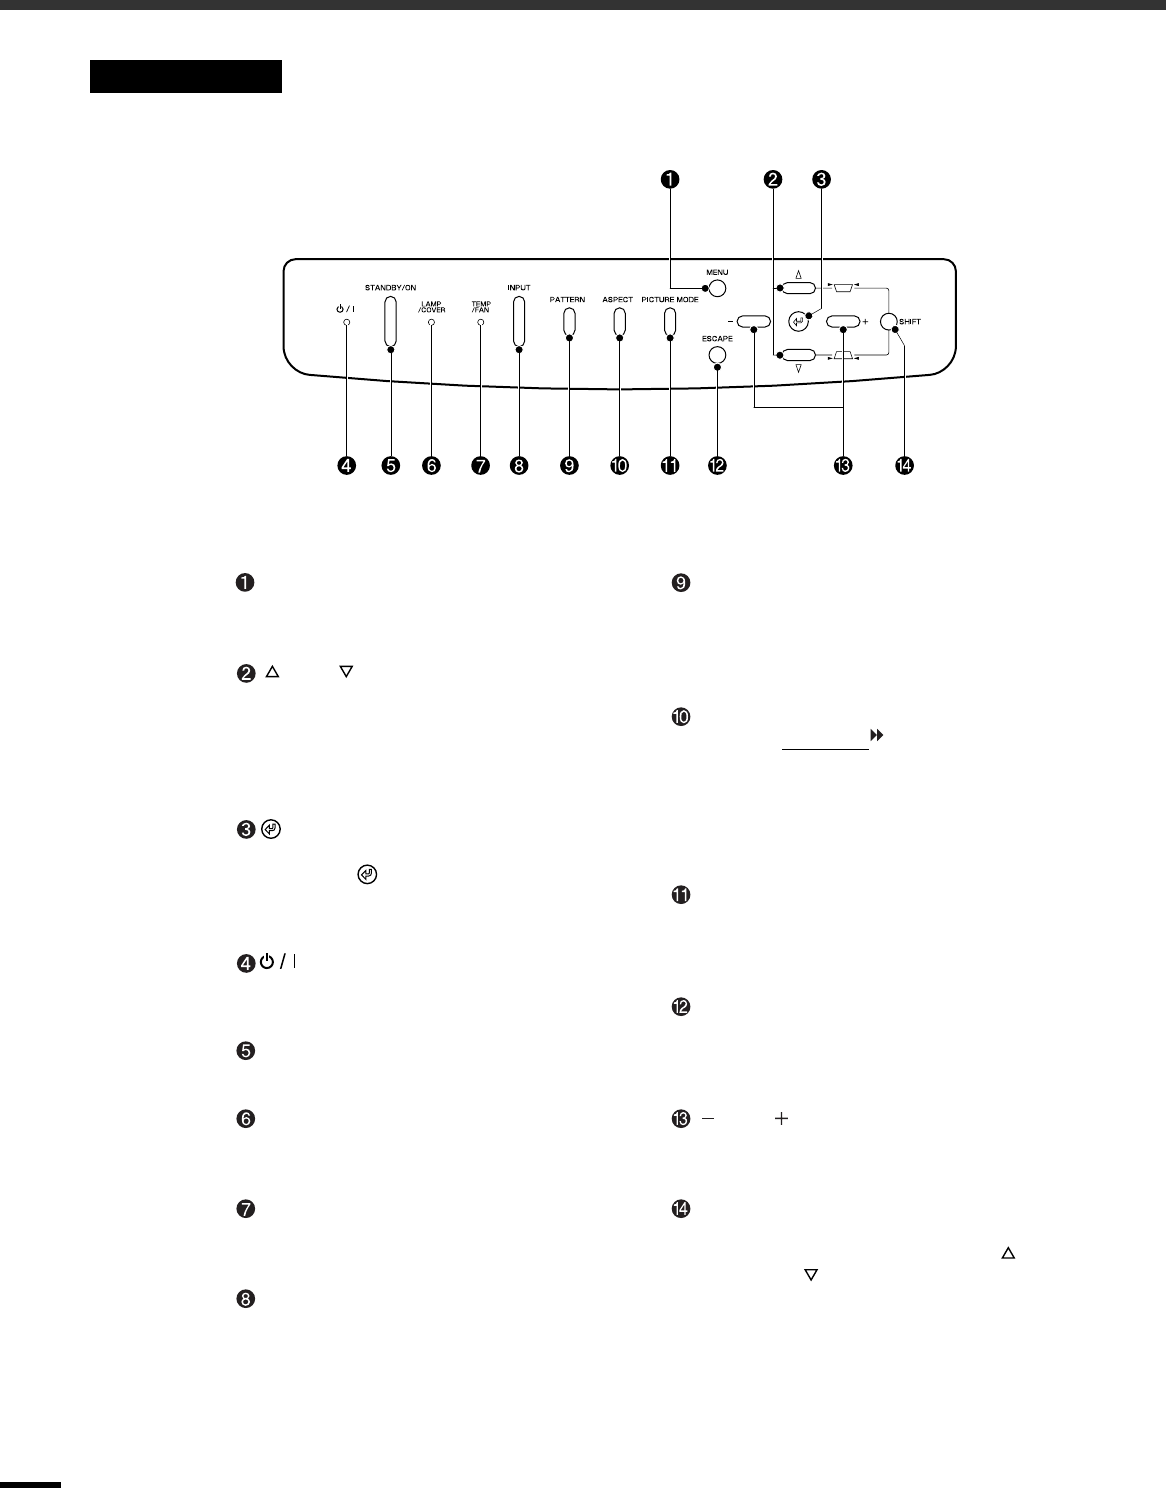
Control Panel
[MENU] button (p.20)
The menus turn on and off each time the
[MENU] button is pressed.
and buttons (p.12, 21, 22, 25)
Press to select an item in the menu or help
menu.
Press and hold the [SHIFT] button while
pressing these buttons to correct keystone
distortion of images.
button (p.21, 22, 25)
Displays the line menu.
Pressing the button while viewing the menu
or the online help selects the menu item and
proceeds to the next display.
indicator (p.36)
Flashes or lights to indicate the operating status
of the projector.
[STANDBY/ON] button (p.7, 9)
Press to turn the projector power on and off.
LAMP/COVER indicator (p.36)
Indicates a problem with the projection lamp or
that the lamp needs to be replaced.
TEMP/FAN indicator (p.36)
Indicates abnormalities in the internal projector
termperature.
[INPUT] button (p.7)
Switches the input source between INPUT A
→
INPUT B
→
D4 VIDEO
→
S VIDEO
→
VIDEO
→
DVI each time the button is pressed.
[PATTERN] button (p.13)
Projects a test pattern for image adjustment.
The test pattern switches between Crosshatch
→
Grayscale Pattern
→
Off each time the
button is pressed.
[ASPECT] button (p.15)
Selects the aspect ratio for projected images
from one of five settings.
The aspect ratio switches between Normal
→
Squeeze
→
Zoom
→
Zoom -Subtitle-
→
Through
→
Squeeze Through each time the
button is pressed.
[PICTURE MODE] button (p.14)
This selects the picture mode. The picture mode
changes in the order A
→
B
→
C
→
PC
→
sRGB each time the button is pressed.
[ESCAPE] button (p.21, 22)
Pressing [ESCAPE] while viewing the menu or
the online help displays the previous screen or
menu.
and buttons (p.20, 21, 22, 25)
These buttons select adjustment values in the
menus and the online help.
[SHIFT] button (p.12)
This button does not function by itself. Press
and hold this button while pressing the
button or the button to correct keystone
distortion of images.