


59
Appendices
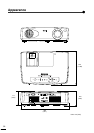
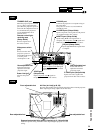
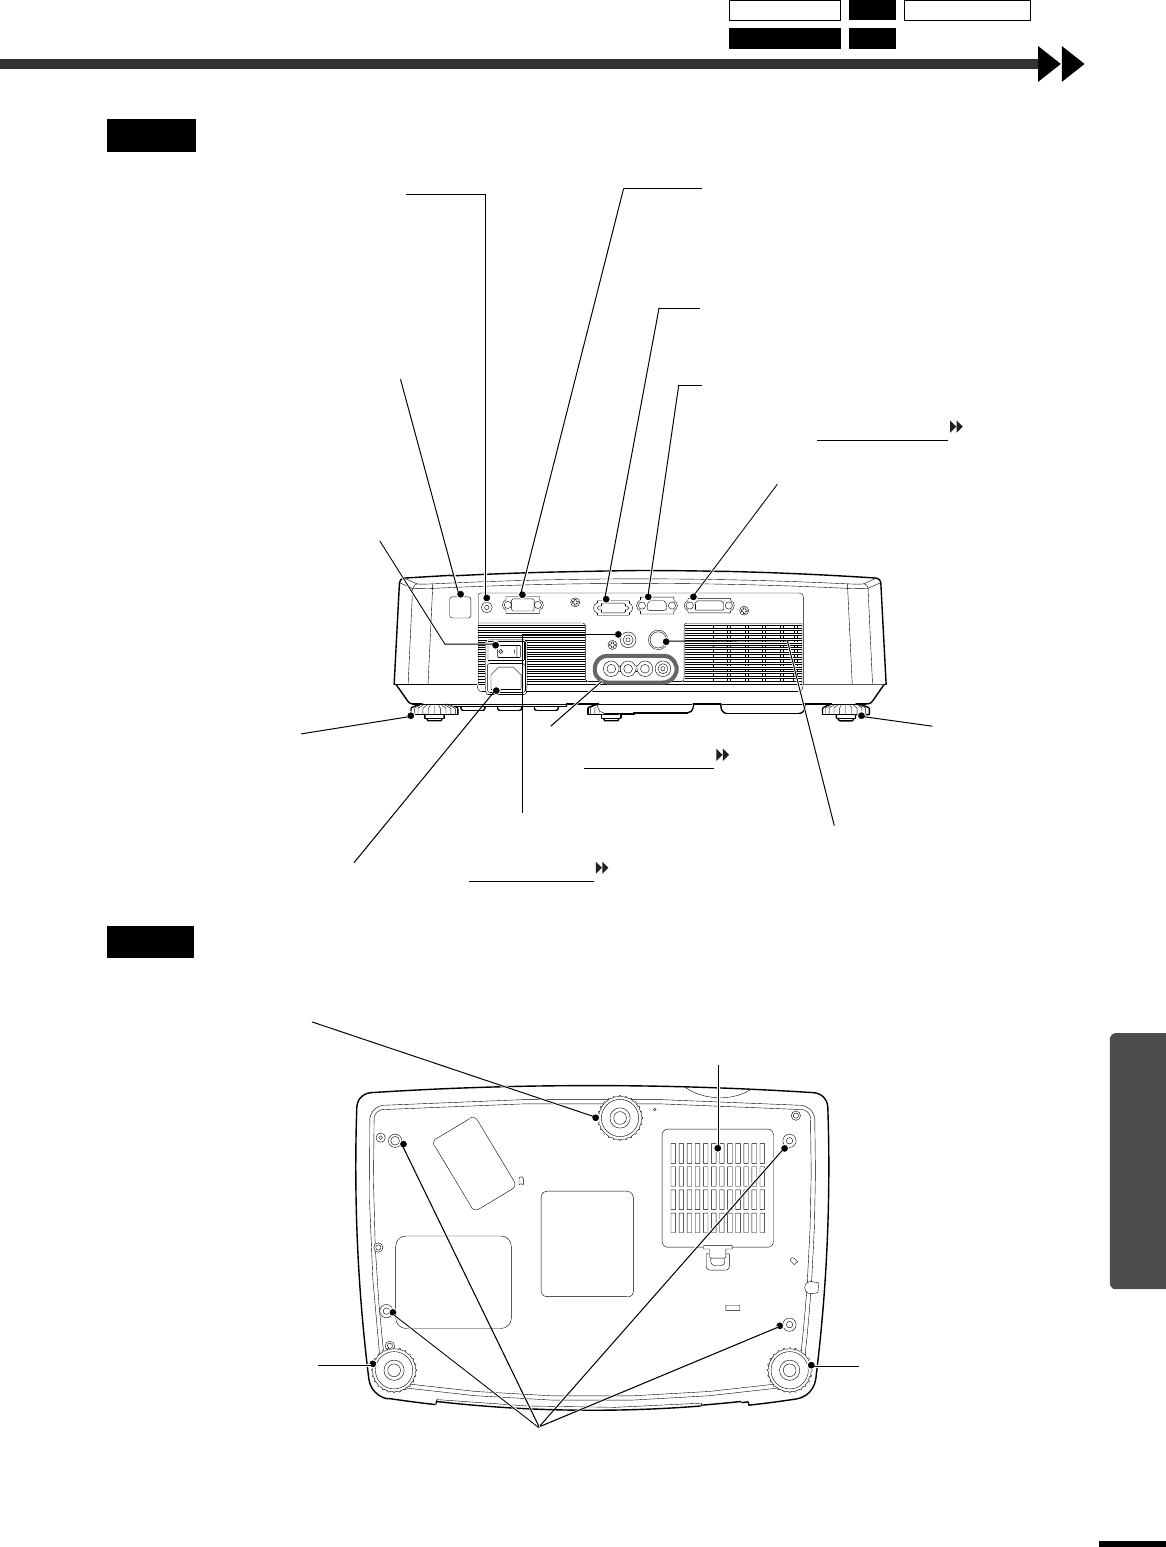
Rear
Base
TRIGGER OUT port
When the projector power is turned
on, 12 V DC is output from this
port. When the projector's power is
turned off, the output becomes 0 V
to communicate the projector's
power ON/OFF status to an
external device.
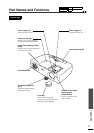
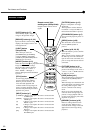
Remote control light-
receiving area
(Setup Guide)
Receives signals from
the remote control.
Main power switch
(p.6)
Press to turn the main
projector’s power on
and off. When the power
is off, the power
consumption is 0 W.
Rear adjustable foot
Extend and retract to
adjust the horizontal
projection angle.
Power inlet (p.6)
Connects the power
cord.
INPUT A port (Setup Guide)
Inputs component video signals
and RGB video signals from other
video sources.
S VIDEO port (Setup Guide)
Inputs an S-Video signal to the
projector from other video sources.
DVI port (Setup Guide)
Inputs digital RGB video signals from
a computer.
INPUT B port (Setup Guide)
Inputs analog RGB video signals from a
computer, and component video
signals and
RGB video signals from other video sources.
RS-232C port
Connects the projector to a computer using an
RS-232C cable.
This port is for service use, and should not
normally be used.
VIDEO port
(Setup Guide)
Inputs composite video signals to
the projector from other video sources.
Rear adjustable foot
Extend and retract to
adjust the horizontal
projection angle.
D4 VIDEO port (Setup Guide)
Inputs component video signals from D ports of
AV equipment.other video sources.
Air filter (air inlet) (p.46, 50)
Prevents dust and other foreign particles from being drawn into the projector.
When replacing the lamp, replace the air filter also.
Rear adjustable foot
Suspension bracket fixing points (4 points) (p.51, Setup Guide)
Install the optional ceiling mount here when suspending the projector from the
ceiling.
Front adjustable foot
Rear adjustable foot
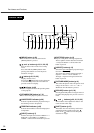
Front/Top Rear Remote control
Control panel Base