


34 Zebra S400 & S600 User’s Guide
'LVDVVHPEOLQJWKH&XWWHU0RGXOH
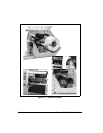
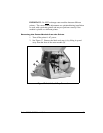
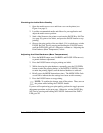
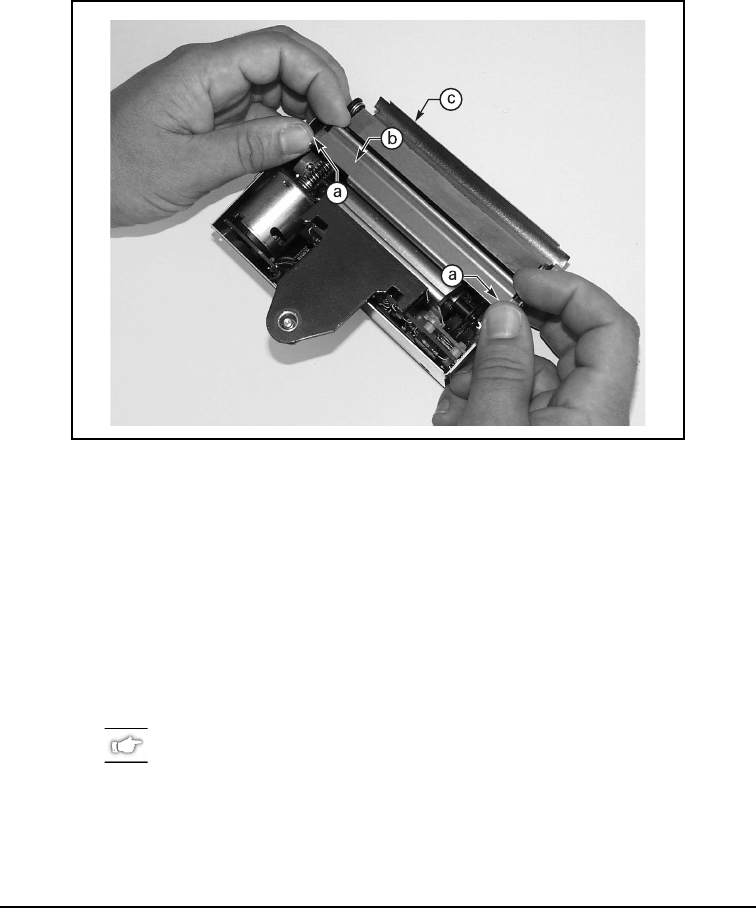
1. See Figure 20. Hold the cutter module as illustrated. Put your thumbs
on the two wire spring loops (a) and your index fingers on the top of
the rear cutter blade guard (b). It may help to lay the cutter module on
a table or other surface throughout this process.
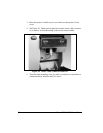
2. To remove the rear cutter blade guard, first press down simultaneously
on the two wire spring loops. While pressing down on the loops, press
the rear cutter blade guard back toward you and over the top of the
loops. (You’re trying to tuck the loops underneath the blade guard in
this process.)
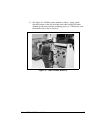
3. Continue pressing the rear cutter blade guard toward you and allow the
back edge of the guard to pop up as the guard comes free from its
holders. You may now remove the rear cutter blade guard by lifting it
off of the module.
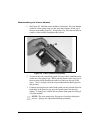
NOTE: The wire springs may flip up out of position during this
process. Springs are repositioned during reassembly.
Figure 20. Cutter Module Disassembly