


Zebra S400 & S600 User’s Guide 39
&KHFNLQJWKH,QLWLDO3ULQW4XDOLW\
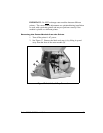
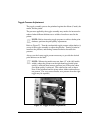
1. Open the media access cover and front cover on the printer (see
Figure 4 on page 5).
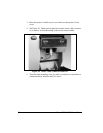
2. Load the recommended media and ribbon for your application and
adjust the media sensor position.
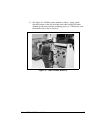
3. Send a label format to the printer or activate the PAUSE Key Self Test
(see page 58), print a few labels, and press the PAUSE button to stop
printing.
4. Observe the print quality of the test labels. If it is satisfactory, exit the
PAUSE Key Self Test by pressing and holding the CANCEL button
until the DATA LED goes off. Otherwise, continue to “Adjusting the
Print Darkness (Burn Temperature)” below.
$GMXVWLQJWKH3ULQW'DUNQHVV%XUQ7HPSHUDWXUH
1. Press the MODE button once (DARKEN and PAUSE LEDs turn on)
to permit darkness adjustment.
2. Press the PAUSE button to begin printing test labels.
3. While observing the print darkness, repeatedly press the UP (FEED)
button to make the printing darker, or the DOWN (CANCEL) button
to make the printing lighter, until the desired darkness is achieved.
4. Briefly press the MODE button three times. The MODE LEDs flash
on and off to indicate that the settings have been saved in memory.
5. Press the PAUSE button to stop printing.
NOTE: To confirm the change, turn off the printer. Then, turn on
the printer while holding the CANCEL button.
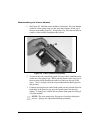
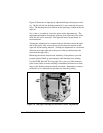
If you are still experiencing poor print quality, perform the toggle pressure
adjustment procedure on the next page. Otherwise, exit the PAUSE Key
Self Test by pressing and holding the CANCEL button until the DATA
LED goes off.