


Chapter 5: Subsystem Maintenance
Subsystem Maintenance 5-5
Step 2. If working on the dual-controller Galaxy HDX2, the workload
should have been taken over by the surviving RAID controller
in the event of single controller failure.
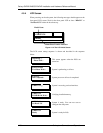
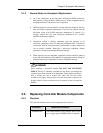
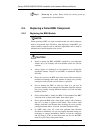
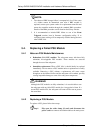
Step 3. Remove the BBU module if one has been installed. Loosen
the BBU module’s retention screw and then simply retrieve it
from the chassis.
Figure 5-1: Removing the BBU Module
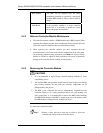
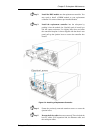
Step 4. Disconnect all cables that are connected to the controller
module you wish to replace. These include the FC cables
connecting to the host or cascaded enclosures the SAS cable to
the expansion enclosure, an Ethernet cable to the management
port, and any cables connected to the RS-232C audio jacks.
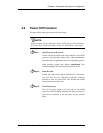
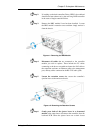
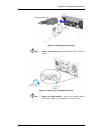
Step 5. Loosen the retention screws that secure the controller’s
ejection levers to the enclosure chassis.
Figure 5-2: Removing the Retention Screws
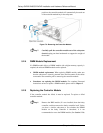
Step 6. Gently press both of the ejector levers in a downward
motion at the same time to disconnect the controller from the
back-end PCB. When the ejector levers are at their lowest