


Chapter 2 Hardware Installation
Hardware Installation
2-9
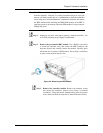
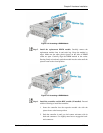
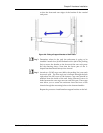
Figure 2-4: Accessing a DIMM Module
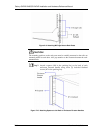
Step 5. Install the replacement DIMM module. Carefully remove the
replacement module from its anti-static bag. Grasp the module by
edges. Make sure the white, plastic ejectors on the sides of DIMM
socket are open. Carefully align the DIMM module to the socket.
Pressing firmly on both ends, push the module into the socket until the
ejectors return to the closed position.
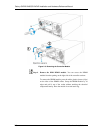
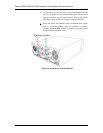
Figure 2-5: Accessing a DIMM Module
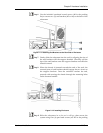
Step 6. Install the controller and the BBU module (if installed). Proceed
with the following to install the controller:
1. Insert the controller into the respective module slot with the
ejector levers at the lowest position.
2. Push the controller in until you feel contact resistance with its
back-end connectors. Use slightly more force to engage the back-
end connectors.