


Chapter 2 Hardware Installation
Hardware Installation
2-13
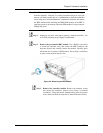
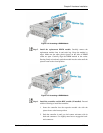
so that the front and rear edges of the bracket fit the vertical
rack posts.
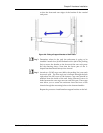
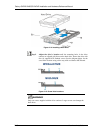
Figure 2-8: Fitting a Support Bracket to Rack Posts
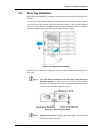
Step 3. Determine where in the rack the subsystem is going to be
installed. Attach four (4) M5 flathead screws (#6 in the packing
list) to secure the bracket to the front and the rear rack posts.
See the drawing above. Note that the lower part of the L-
shaped brackets should always face inward.
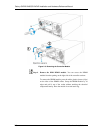
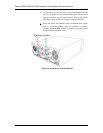
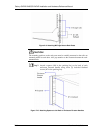
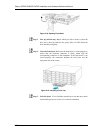
Step 4. Attach two (2) M5 cage nuts (#8 in the packing list) onto each
front rack post. The first cage nut is inserted through the hole
right above the M5 screw at the bottom. Cage nuts should be
attached from the inside of the rack facing outward. Leave six
holes between the two cage nuts on each rack post. These cage
nuts allow you to secure the enclosure from the front of the
chassis through the mounting holes on the forearm handles.
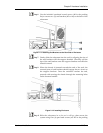
Repeat the process to install another support bracket on the left.