


Galaxy GHDX2-2430S/R-24F4D Installation and Hardware Reference Manual
Hardware Installation
2-20
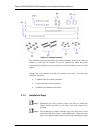
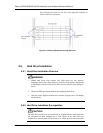
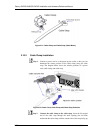
Figure 2-18: Opening Front Bezel
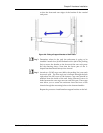
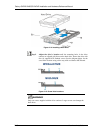
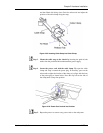
Step 3. Line up with the tray slot in which you wish to insert it. Once the
drive tray is lined up with the slot, gently slide it in. This should be
done smoothly and gently.
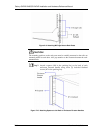
Step 4. Close the front bezel. Make sure the front bezel is closed properly to
ensure that the back-end connector is firmly mated with the
corresponding connector on the backplane. If the front bezel is not
closed properly, the connection between the hard drive and the
subsystem will not be secure.
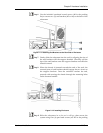
Figure 2-19: Installing a Drive Tray
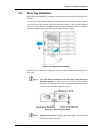
Step 5. Lock the bezel. Use a flat blade screwdriver to turn the rotary bezel
lock until the groove on its face is in a vertical orientation.