Print Server User’s Guide
14
Using PCONSOLE / PSCONFIG
After using PCONSOLE to configure the Novell server, the device must be
configured. This section uses PSCONFIG to perform this task, but the other
programs described in Chapter 8 - Management Tools could be used instead.
Novell Print Server Mode
Before you begin, please note the following information:
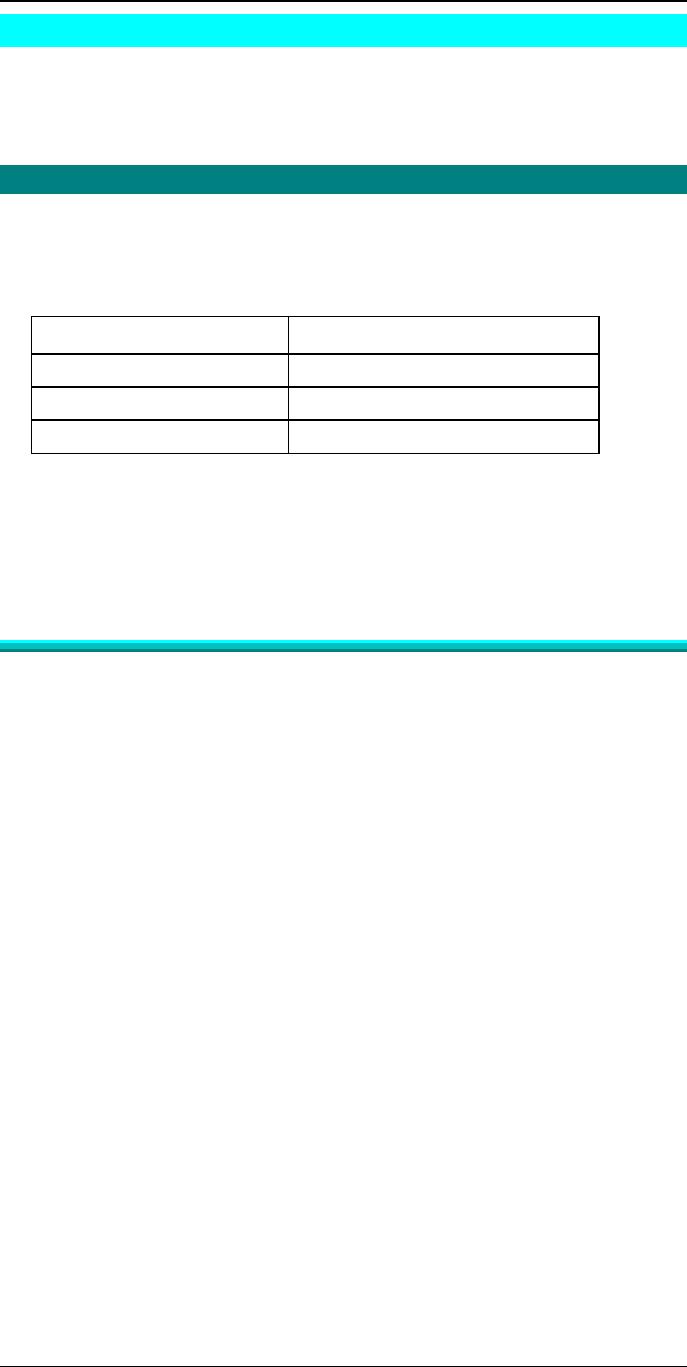
♦ Novell Printer Numbers
NetWare printer numbers match device ports as follows.
Novell Printer Number Device Port
Printer number 0 Parallel Port 1
Printer number 1 Parallel port 2
Printer number 2 Parallel port 3 OR the serial port.
♦ Assigning users to printer queues
If new printer queues are created, users needing to use the print queues may need
to be designated as queue users by using PCONSOLE.
Print Server Mode in NetWare 2.x, 3.x
Follow the steps listed below to configure the Print Server in NetWare print server
mode.
1. Create Queues
If you are setting up the Print Server for use with existing queues, proceed to
Step 2.
(a) Log into a NetWare file server as a SUPERVISOR or as a user with
SUPERVISOR rights.
(b) Run PCONSOLE program.
(c) Select Print Queue Information (or skip to step 6 if you do not need to add
new queues).
(d) Press [Ins] key to add a new queue.
(e) Type a queue name, and press [ENTER].
(f) Repeat Steps (d) and (e) until you have the desired number of queues.
2. Add a Novell print server
Follow these steps to inform NetWare that a print server exists.
(a) From the PCONSOLE Main Menu, select Print Server Information
(b) Press [Ins] key to add a new print server.
(c) Enter your desired print server name.
3. Assign printers
Follow these steps to associate the NetWare printer objects with the Print
Server’s printer ports.
(a) Select the Print Server just added.


