Novell NetWare
17
Novell Remote Printer Mode
Remote Printer Assignments
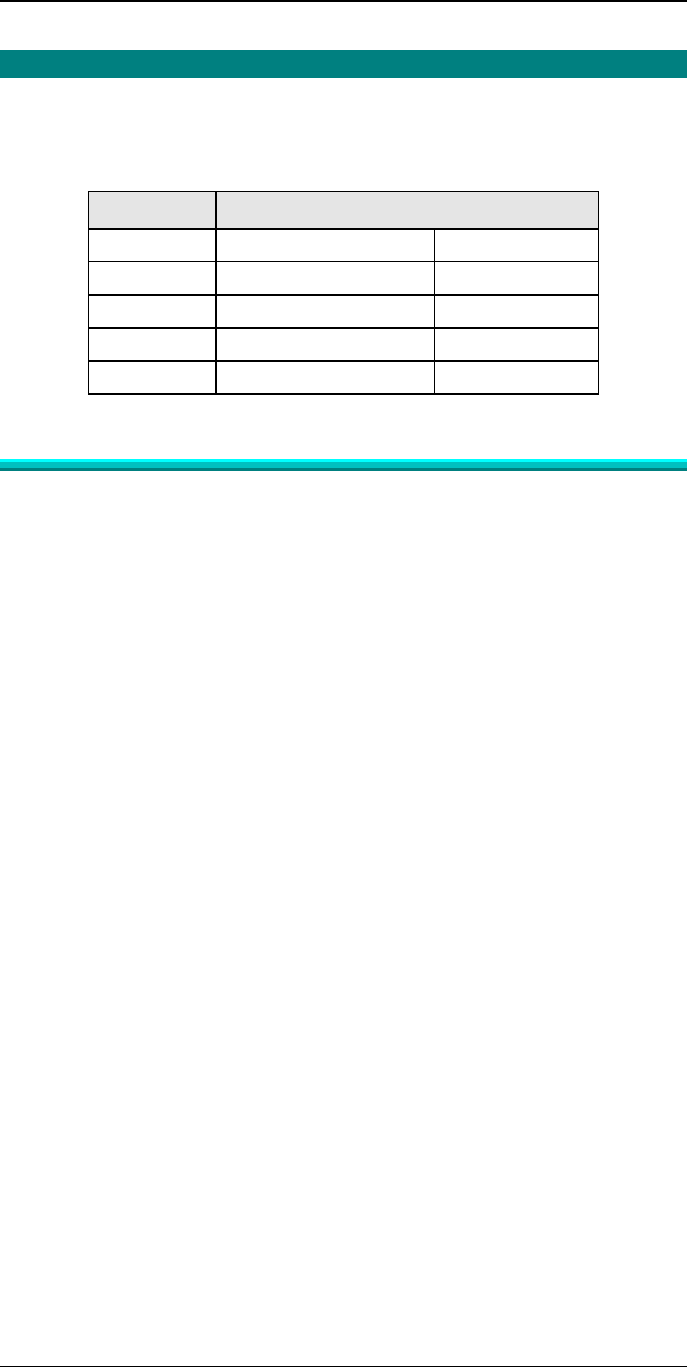
In remote printer mode the following assignments should be used, where SCxxxxxx
is the device name.
Device NetWare
Port Printer Type Printer Name
Parallel 1 Remote Parallel, LPT1 SCxxxxxx
Parallel 2 Remote Parallel, LPT2 SCxxxxxx_P2
Parallel 3 Remote Parallel, LPT3 SCxxxxxx_P3
Serial Remote Serial, COM1 SCxxxxxx_SP
Remote Printer Mode in NetWare 2.x, 3.x
Follow the steps listed below to configure the Print Server to Novell Remote Printer
mode.
1. Create Queues
Follow the steps below to create queues for the Print Server. If using existing
queues go to Step 2.
(a) Run PCONSOLE program.
(b) Select Print Queue Information (or skip to step 2.(a) if you do not need to
add new queues).
(c) Press [INS] key to add a new queue.
(d) Type a queue name, and press [ENTER].
(e) Repeat Steps (c) and (d) until you have the desired number of queues.
2. Assign printers
(a) Run PCONSOLE, select Print Server Information
(b) Select a NetWare Print Server.
(c) Select Print Server Configuration.
(d) Select Printer Configuration
(e) Select printers that show Not Installed.
(f) Enter the correct data in the Name and Type Fields. Refer to Remote Printer
Assignments on page 17.
(g) Press [ESC], then select Yes.
(h) Repeat steps (b) to (g) until all printers are assigned.
(i) Press [ESC].
3. Associate printers with print queues
(a) Select Queues Serviced by Printer.
(b) Select a printer you want to assign a print queue to.
(c) Press [INS].
(d) Select the queue that you want the printer to service, and press [ENTER].
(e) Repeat Steps (a) to (d) until all printer and queue associations are configured.
(f) Exit PCONSOLE


