


TCP/IP
37
Windows NT 4.0
1. Go to StartèSettingsèControl PanelèNetwork.
2. Click the Service option and ensure that Simple TCP/IP Service and Microsoft
TCP/IP Printing are enabled. If they are not enabled, select the Add option and
enable them as usual.
3. If you added services in step 2, reboot the computer for the changes to take
affect.
Adding a TCP/IP Remote Printer
Windows 3.51
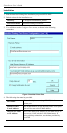
1. From the Printer menu in Print Manager, choose Create Printer
2. In the resulting dialog box, enter data as follows:
Printer Name
Enter a name (up to 32 characters). This name appears in
the title bar of the printer window.
Driver
Select the appropriate driver for the attached printer.
Description
Enter a printer description for other network users to
reference.
Print To
Select Other.
3. A Print Destinations dialog box will appear after selecting Other. In the
Available Print Monitor list, select LPR Port, then OK.
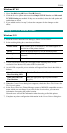
4. An Add LPR compatible printer window will appear. Enter data in the fields as
follows:
Name Or Address Of
Host Providing LPD
Enter the IP address of the Print Server
Name Of Printer On
That Machine
Enter the appropriate logical printer number
(e.g. L1)
5. When the Create Printer dialog box reappears, check the Share This Printer On
The Network option.
6. In the Share Name box, Printer Manager creates a MS-DOS compatible resource
name, which you can change if you wish. In the Location box, you can enter
information concerning the printer location.
Network users will see this information when browsing to find this printer.
7. Complete any other configuration information in the Create Printer dialog box.