


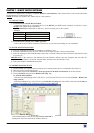

Chapter 5 : FRONT PANEL DISPLAY MENUS DESCRIPTION (continued) OCTO² / QFX402
PAGE 34
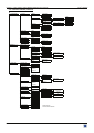
8[CONTROL] + ENTER.
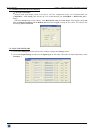
8-1 [Versions] + ENTER.
Version _._= update version.
I1 to I4 = Identification number.
K, A, B, C, O = status of the internal firmware versions.
8-2 [Transition] + ENTER.
Select an item with + ENTER
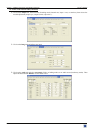
8-2-1 [Fade color] + ENTER.
This function allows selecting the color of the fade during the transition. Select a color (red, green and bleu)
with + ENTER and adjust the level with + ENTER. During the adjustment the color is
displayed onto the output. To obtain the black color, set the 3 levels to the minimum. To obtain the white
color, set the 3 levels to maximum. To obtain the grey color, set the 3 levels in the middle.
8-2-2 [Clean cut] + ENTER.
This function allows a clean switching thanks to a fast freeze of the displayed source. Select a function with
+ ENTER.
• [From computer]: The CLEAN CUT operates only when switching from a computer source. The
others switching operates with a fade color.
• [From video]: The CLEAN CUT operates only when switching from a computer source. The others
switching operates with a fade color.
• [From all]: The CLEAN CUT operates when switching from all sources.
8-2-3 [Fade frame*] + ENTER.
This function allows switching by a fading to a frame (instead of a color). Select a frame and adjust the
duration of the transition with + ENTER.
8-3 [Sync loss] + ENTER.
Allows to display a frame or a source in case of sync-loss of the selected input. Select an items with +
ENTER
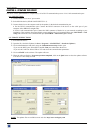
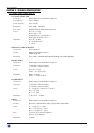
8-4 [RS232/LAN port] + ENTER.
Select the needed communication port with + ENTER.
• [RS232]: Enables the RS-232 communication port. (Default setting).
• [LAN]: Enables the LAN communication port.
IMPORTANT: To avoid addresses conflict, configure the LAN communication port (with the LAN setup
menu)
before activates it.
NOTE:
The RS-232 & the LAN communication ports can not be used simultaneously.
* OFX803 & QFX402.