


iMac G5 (20-inch iSight) Troubleshooting — General Info 145
Testing Under Power
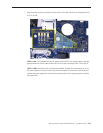
Using the diagnostic LEDs to check for power issues requires powering on the system with
the diagnostic LEDs visible. To access the Diagnostic LEDs, follow the preceding steps under
“Accessing the Diagnostics LEDs.” Never remove components not included in the “Accessing
the Diagnostic LEDs” procedure when testing the system under power.
WARNING: HIGH VOLTAGE
The AC/DC power supply board is a high voltage source with the unit under power, and remains
powered up whenever the system is plugged in, whether or not the system is turned on. Use
extreme caution when troubleshooting the system with the front bezel removed.
Disconnect power to the system before performing maintenenace.•
Don’t work alone. In the even of an electrical shock it is important to have another •
individual present who can provide assistance.
Keep one hand in your pocket when working on any iMac G5 (iSight) that is plugged in. •
This will help ensure that your body does not provide a path to ground in the event that
you accidentally make contact with the line voltage.
Don’t wear jewelry, watches, necklaces, or other metallic articles that could present a risk •
if they accidentally make contact with the power supply circuitry.
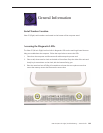
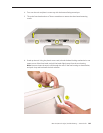
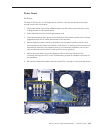
To power on the computer with the diagnostic LEDs visible:
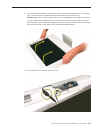
Follow the steps in the “Accessing the Diagnostic LEDs” procedure.1.
Stand up the computer—return it to an upright position.2.
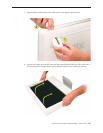
Plug in the power cord. Press the power button at the rear of the unit. 3.
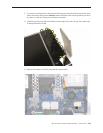
Observe the LEDs, which will come on indicating the computer status as indicated below: 4.
LED 1 Operation: Should turn on as soon as the power cord is plugged into the system,
indicating that line voltage is present and basic power supply functionality is OK.
LED 2 Operation: Should turn on as soon as the power button is pressed, indicating the
remainder of the power supply system is functioning.
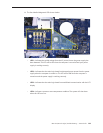
LED 3 Operation: Should turn on as soon as the system conrms that communication is
established with the LCD display. The display and backlights should be on.
LED 4 Operation: Turns on in the event that the processor overheats.
To shut o the computer with the front bezel removed, press the power button at the rear of 5.
the unit for at least ve seconds. The green LEDs will go out.