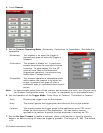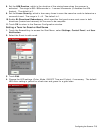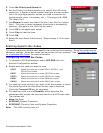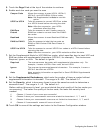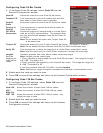
Configuring Code 39 Bar Codes
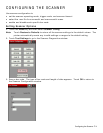
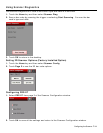
1. To configure Code 39 settings, select Code 39 from the
Scanner Configuration window.
Code 39
Allows the scanner to scan Code 39 bar codes.
Transmit CD
Tells the scanner to return the check digit with the
data when a Code 39 bar code is scanned.
Code32
Prefix
Allows the scanner to scan Code 32 Prefix bar codes.
Convert to
Code32
Tells the scanner to convert Code 39 bar codes to
Code 32 bar codes.
Full ASCII
Conversion
Allows the scanner to interpret data in a Code 39 bar
code as an ASCII representation. The scanner does
not auto discriminate between Code 39 and Code 39
Full ASCII.
Note: Do not enable this option and Trioptic Code 39
at the same time.
Trioptic 39
Allows the scanner to scan Trioptic Code 39 bar codes. The length is always 6.
Note: Do not enable this bar code and Code 39 Full ASCII at the same time.
Verify CD
Tells the scanner to check the integrity of all Code 39 bar codes that it scans.
Note: Use this option only for Code 39 bar codes with a modulo 43 check digit.
Lengths
Sets the
length(s) for
Code 39 bar
codes.
Variable, specifies that Code 39 bar codes can be any length.
Note: Lengths include check digits.
1 Fixed, specifies a single length for valid Code 39 bar codes. The range for Length 1
is 2 – 99. The default is 2.
2 Fixed, specifies two lengths for valid Code 39 bar codes. The range for Length 2 is
2 – 99. The default is 55.
If you have enabled Code 39 Full ASCII, choose Variable.
Note: Specifying a range of lengths increases the likelihood of unsuccessful scans.
2. Enable each bar code you need to scan.
3. Touch OK to save all the settings and return to the Scanner Configuration window.
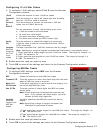
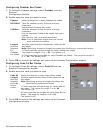
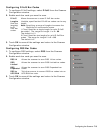
Configuring Code 128 Bar Codes
1. To configure Code 128 settings, select Code 128 from the
Scanner Configuration window.
Code 128
Allows the scanner to scan Code 128 bar codes.
UCC/
EAN-128
Allows the scanner to scan UCC/EAN-128 bar codes.
ISBT 128
Allows the scanner to scan ISBT 128 bar codes. Any
length bar code is valid.
2. Enable each bar code you need to scan.
3. Touch OK to save all the settings and return to the Scanner
Configuration window.
7-6 System Administrator’s Guide


