


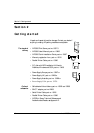

Section 2: Getting started
12 Axis NPS 550 User’s Manual
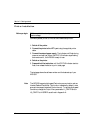
Printer Installation
Connect a parallel printer to NPS 550 and make a test printout:
1. Switch off the printer.
2. Connect the printer to the LPT1 port using the supplied printer
cable.
3. Connect the external power supply. The indicators will flash during
power-on and self-test. When the STATUS indicator stops flashing
and remains unlit, the NPS 550 is ready for use.
4. Switch on the printer.
5. Press and hold the test button until the STATUS indicator starts to
flash, then release the button to print a test page.
The test page shows the software revision and the basic setup of your
NPS 550.
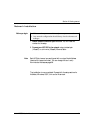
Note: The NPS 550 supports high-speed Centronics communication such as
Hewlett-Packard Fast Mode. This function is disabled by default, since
some printers support standard Centronics only. To activate high-speed
Centronics, change the Output Menu parameters L1_CENTR and/or
L2_CENTR to HISPEED as outlined in Appendix A.
Before you begin:
Make sure that the external power supply is marked with the correct
mains voltage.