


Section 7: Setup for Macintosh
Axis NPS 550 User’s Manual 55
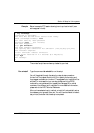
LaserWriter 8.0
Printer Driver
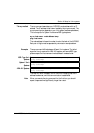
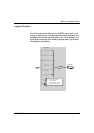
Open the Chooser window by clicking Chooser in the Apple menu. Fol-
low these steps to choose a printer:
1. Click the LaserWriter 8.0 icon.
2. If your network has more than one zone, click on the zone you want.
If your network has no zones, this box does not appear.
3. Click the name of the printer you want. The three default NPS 550
printer names are shown as AXIS<nnnnnn>_<port>, where <nnnnnn>
is the last six digits of the NPS 550 serial number, and <port> is LPT1,
LPT2 and COM1 respectively.
Example:
AXIS100086_LPT1
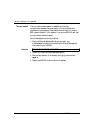
4. Click the ‘Setup...’ button, and then the ‘Select PPD...’ button.
5. Choose the PPD file matching your printer, and click ‘OK’. If your
printer doesn’t appear in the PPD file list, contact your printer ven-
dor. You may also use the Generic PPD if you don’t need any printer
specific features.
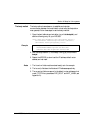
6. Click ‘OK’, and then click the close box. This completes the configu-
ration and closes the Chooser.
Repeat this procedure for each Macintosh using the NPS 550.
Verify the Communication
To verify communication by making a test printout, just print a docu-
ment from the desktop or from within a program. The printout will
appear on the printer you have chosen.
You have completed the basic installation and the NPS 550 is ready to
use as a print server.
Note: For information on advanced EtherTalk functions such as non-PostScript
printer support, please refer to the AXIS NPS Print Server Technical Ref-
erence.