


Section 5: Setup for OS/2
40 Axis NPS 550 User’s Manual
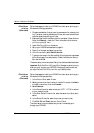
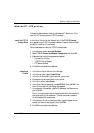
Install the NPS 550
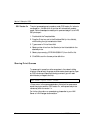
Once the Axis Print Utility is installed and running, you can install the
NPS 550 by clicking the Install entry on the action bar. The Install
command initiates a search for Axis print servers on the network. Your
new NPS 550 will appear in the list (together with any other Axis print
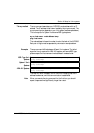
servers) as three printer ports:
The digits following AX are the six last digits of the NPS 550 serial
number (100086 in this example). LP1, LP2 and CM1 are the NPS 550
printer ports (LPT1, LPT2 and COM1 respectively).
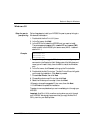
The Axis print server ports appearing in the list can now be assigned as
print queue destinations as described below.
Note: If the serial number of your NPS 550 is 00408C100086
, then the default
port names are AX100086
.LP1, AX100086.LP2 and AX100086.CM1.
The serial number is found on the label at the back of the NPS 550. You
may change the default names by editing parameters LPRINT_1,
LPRINT_2, etc. in the config file as described in Appendix A. If you want
to change the default port names, you must do that before installing the
NPS 550 using Axis Print Utility.
AX100086.LP1
AX100086.LP2
AX100086.CM1