


Section 3: Setup for NetWare
22 Axis NPS 550 User’s Manual
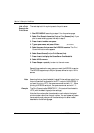
NetWare 4.xx: 1. Log in as supervisor to the NetWare server, and start PCONSOLE.
2. Press <F4> to switch to Bindery Mode.
3. Select Change Current NetWare Server, then select the file server at
which you want to keep the queue and printer configurations. Make
a note of the configuration file server name, you will need it during the
NPS 550 configuration.
4. Select Print Servers, then add the new print server AXIS<nnnnnn>.
See “Add a Print Server” (page 17) for details.
5. Select AXIS<nnnnnn>.
6. Select Serviced NetWare Servers.
7. Press <Insert> to see the list of Available NetWare Servers. Add all
file servers you want the NPS 550 to log in to, then press <Esc> to get
back to the Print Server Information menu.
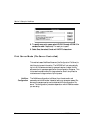
8. Select Printers. An empty list of Defined Printers appears. Printers are
numbered from 0 to 255 in the order that they are defined. The print-
ers numbered 1–8 correspond directly to the NPS 550 logical printers
PR1–PR8. No other printer numbers are used by the NPS 550.
9. Press <Insert> to define printer number 0. Name it ‘DUMMY’,
‘UNUSED’ or similar to indicate that this printer is not used.
10.Press <Insert> to define printer number 1. Name it ‘PRINTER_1’
or whichever name you prefer. The printer names are not used by
the NPS 550.
11.Select printer number 1. The printer is by default named ‘Printer 1’.
12.Select Print Queues Assigned and press <Insert> to see the list of
Available Print Queues.
13.Select the queues you want printer number 1 to service. Repeat steps
10 – 13 for each additional printer number you want to define.
14.Exit PCONSOLE.