


41
Inserting an Image into a Label
You can use either of following two methods to input an image into a label.
• Inputting an image from a file
• Capturing a PC screen image
Important!
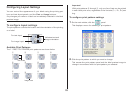
• To input an image into a label, you need to select print pattern 6 or
pattern 7 (page 36), or a setting that is marked with on the
Advanced Print Pattern Settings dialog box (page 37).
• Even if you are inserting a color image, it is printed in monochrome in
accordance with the “Dithering” settings. See page 44 for more
information.
• To view the actual print image, click .
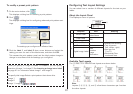
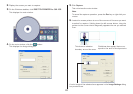
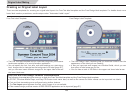
To input an image from a file
1.
On the main window, click the button.
This displays the Image dialog box.
2.
If you are creating a label that allows input of multiple images, tap the
tab for the image (Image 1 or Image 2) you want to input.
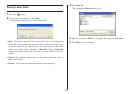
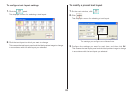
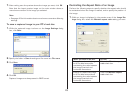
3.
Click Open Image.
4.
Select the file name of the BMP or JPEG image you want to input, and
then click Open.
This displays the selected image in color in the center of the Image
Settings dialog box preview area.
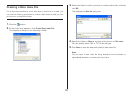
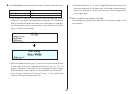
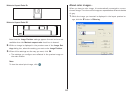
5.
After making sure the preview shows the image you want, click OK.
Note that the layout preview image on the main window shows the
image you selected in monochrome.
Note
• See page 44 for information about monochrome conversion dithering
settings.
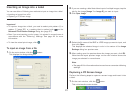
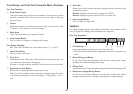
Capturing a PC Screen Image
Perform the following steps to capture a screen image and insert it into
a label.
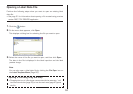
1.
On the main window, click the button.
This minimizes the main window.