58
Configuring Field Properties
(Free Design Template)
Clicking the button and then Properties displays a dialog box that you
can use to change the properties of a field.
Note
The unit of measurement (millimeters, pixels, inches) used on the Field
Properties dialog box is the same as that selected with the ruler unit of
measurement unit button (Page 48).
To reposition and resize a field
1.
Select the field you want to reposition. On the main window, click .
Note
If multiple fields are selected, only the reference field (the one with
the gray selection boundary) can be repositioned.
2.
On the menu that appears, click Properties.
This displays the Field Properties dialog box.
3.
Input the values you want. The settings you configure are reflected in
the preview image on the main window.
4.
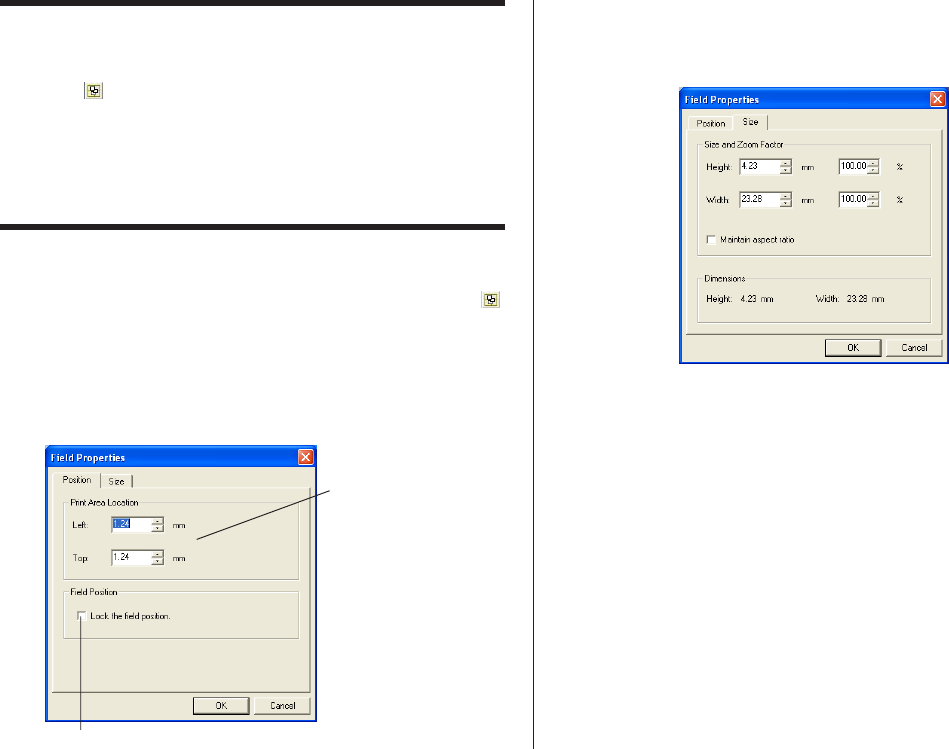
Click the Size tab.
Size and Zoom Factor
Inputting a value in one box automatically changes the value in the
other box.
Maintain aspect ratio
When this check box is selected, the field is resized while maintaining
the relative ratio between its vertical and horizontal dimensions.
When this checkbox is cleared, a field can be resized by changing the
horizontal or vertical dimension only.
Dimensions:
These are the dimensions of the image when it was originally cap-
tured or imported from a file.
5.
Input the values you want and then click OK. The settings you configure
are reflected in the preview image on the main window.
Print Area Location
These values indicate the
relative location of the
print area from the upper
left corner of the work
area. Changing the values
in the box causes the
print area to move to the
new location.
Select this option to lock the field, which make it impossible to move it.
