


43
7.
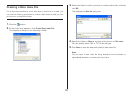
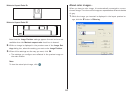
After making sure the preview shows the image you want, click OK.
Note that the layout preview image on the main window shows a
monochrome version of the image you selected.
Note
• See page 44 for information about monochrome conversion dithering
settings.
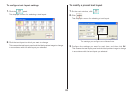
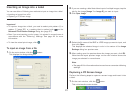
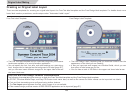
To save a captured image to your PC’s hard disc
1.
While the captured image is shown on the Image Settings dialog
box, click Save.
2.
Specify the folder in Save in and type a file name into File name.
3.
Click Save.
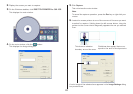
4.
Click OK.
Captured images are always saved in BMP format.
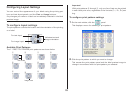
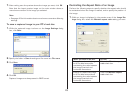
Controlling the Aspect Ratio of an Image
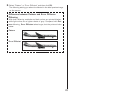
Perform the following steps to specify whether the aspect ratio should
be maintained when the image is resized, and to specify the position of
the image.
1.
While an image is displayed in the preview area of the Image Set-
tings dialog box, select the Maintain aspect ratio setting you want.
When you want to do this:
Enlarge or reduce the image
to fit the label area while
maintaining the ratio between
the image’s vertical and
horizontal dimensions.
Enlarge or reduce the image
to fit the label area without
maintaining the ratio between
the image’s vertical and
horizontal dimensions.
Do this:
Select the Maintain aspect
ratio check box.
Clear the Maintain aspect
ratio check box.