


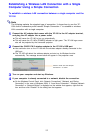


56
4
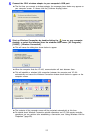
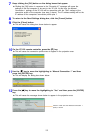
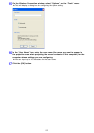
Configure the settings on the dialog box.
z In this example, we will use the following settings.
z For details about each of the settings on the dialog box, see “Manual Connection Setting
Reference” (page 79).
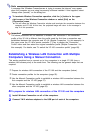
5
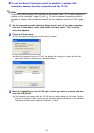
After configuring all of the settings you want, click the [Register] button.
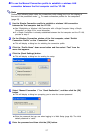
6
On the confirmation dialog box that appears, click the [OK] button.
z This will register your settings as a new connection profile (named “Test” here) and
return to the connection profile switching dialog box in step 1. The newly created profile
(Test) will be selected on the dialog box.
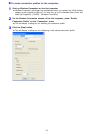
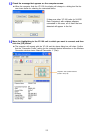
7
Repeat steps 1 through 5 for all of the other computers.
z For the settings in step 4, simply change the IP address as shown below.
Computer 2: 192.168.100.10
Computer 3: 192.168.100.11
Computer 4: 192.168.100.12
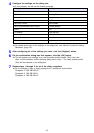
Dialog Box Item Setting
Profile Name Test
SSID CASIO_DPJ
Access Mode Ad Hoc
Security Setup WEP
WEP Key Format ASCII/128bit
WEP Key/WPA/WPA2 Pass Phrase 1234567890abc
DHCP Off
IP Address 192.168.100.1
Subnet Mask 255.255.255.0
Default Gateway 0.0.0.0
Channel Auto