


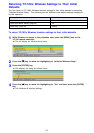
76
6
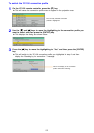
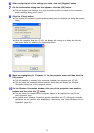
After configuring all of the settings you want, click the [Register] button.
7
On the confirmation dialog box that appears, click the [OK] button.
z This will register your settings as a new connection profile and return to the connection
profile switching dialog box in step 1.
8
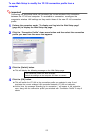
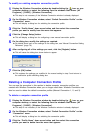
Click the [Close] button.
z This closes the connection profile switching dialog box and displays the dialog box shown
below.
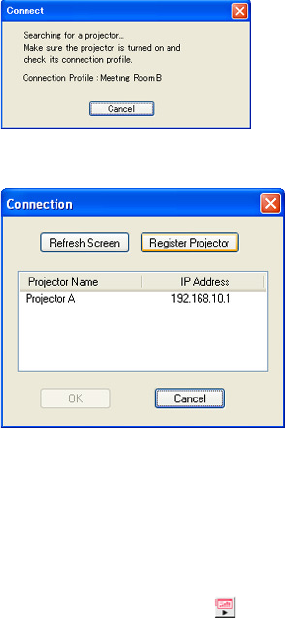
z When the computer finds the YP-100, the display will change to a dialog box like the
one shown below for selecting the connected device.
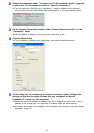
9
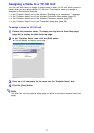
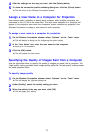
Move the highlighting to “Projector A” for the projector name and then click the
[OK] button.
z This will establish a wireless LAN connection between the computer and YP-100.
z This will close the connected device selection dialog box and display the Wireless
Connection dialog box on the computer screen.
10
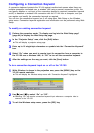
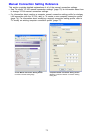
On the Wireless Connection window, click one of the projection area position
buttons and then click the button.
z This will cause the contents of the computer screen to be projected so they fill the
entire projection area.
z For details about Wireless Connection window operations and YP-100 remote controller
operations you can perform after establishing a connection, see “Using Wireless LAN for
Projection” (page 90).