


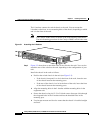

Chapter 3 Installing the Switch
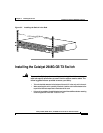
Installing the Catalyst 2948G-GE-TX Switch
3-10
Catalyst 2984G, 2948G-GE-TX, and 2980G Switch Hardware Installation Guide
78-6286-05
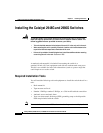
To install a Catalyst 2948G-GE-TX switch, follow the steps described in these
procedures:
• Rack-Mounting the Catalyst 2948G-GE-TX Switch, page 10
• Wall-Mounting the Catalyst 2948G-GE-TX Switch, page 16
• Mounting the Catalyst 2948G-GE-TX Switch on a Table or Shelf, page 19
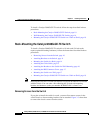
Rack-Mounting the Catalyst 2948G-GE-TX Switch
To install a Catalyst 2948G-GE-TX switch in a 19-inch rack (24-inch racks
require optional mounting hardware), follow the instructions described in these
procedures:
• Removing Screws from the Switch, page 10
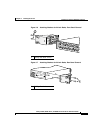
• Attaching Brackets to the Switch, page 11
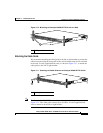
• Mounting the Switch in a Rack, page 14
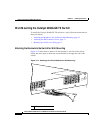
• Attaching the Cable Guide, page 15
• Attaching the Brackets to the Switch for Wall-Mounting, page 16
• Attaching the RPS Connector Cover, page 17
• Mounting the Switch on a Wall, page 17
• Mounting the Catalyst 2948G-GE-TX Switch on a Table or Shelf, page 19
Note Installing the switch in a 24-inch rack requires an optional bracket kit not included
with the switch. You can order a kit containing the 24-inch rack-mounting
brackets and hardware (order part number RCKMNT-1RU=) from Cisco.
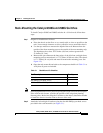
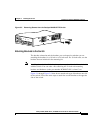
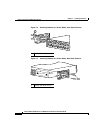
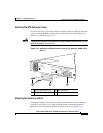
Removing Screws from the Switch
If you plan to install the switch in a rack, you must first remove screws in the
switch chassis so that mounting brackets can be attached. Figure 3-3 shows how
to remove the chassis screws from the switch.