Chapter 4 Installing Hardware Options
Installing Adapters
4-8
Cisco Wide Area Application Engine 511 and 611 Hardware Installation Guide
OL-7220-02
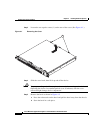
Step 7 Touch the static-protective package that contains the adapter to any unpainted
metal surface on the device, and then remove the adapter from the
static-protective package. Avoid touching the components and gold-plated edge
connectors on the adapter.
Step 8 Place the adapter, component-side up, on a flat, static-protective surface and set
any jumpers or switches as described by the adapter manufacturer, if necessary.
Caution When you install an adapter in the device, be sure that it is completely and
correctly seated in the PCI expansion slot before you power up the device.
Incomplete insertion might cause damage to the system board or the adapter.
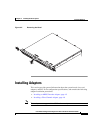
Step 9 To install the adapter, carefully grasp the adapter by its top edge or upper corners,
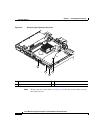
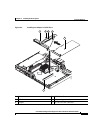
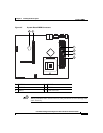
align it with the PCI-X slot 1 connector (labeled 2 in Figure 4-4), and then press
the adapter firmly into the expansion slot.
Step 10 Reinstall the riser card. Make sure that the riser card is fully seated in the riser
card connector (labeled 5 in Figure 4-4) on the system board.
Step 11 Tighten the captive screw for expansion slot 1.
Step 12 Connect the required cables to the adapter.
Step 13 If you have other hardware options to install, do so now; otherwise, go to the
“Completing the Installation” section on page 4-17.
Installing a Fibre Channel Adapter
Fibre Channel is a high-speed data transport technology used for mass storage and
networking. Fibre Channel technology is outlined in the SCSI-3 Fibre Channel
Protocol (SCSI-FCP).
The Fibre Channel adapter uses a multimode shortwave optical interface for
distances up to 1640 feet (500 meters). It is a 2-gigabit (Gb) Fibre Channel device
that supports data transfer rates up to 200 megabytes per second (MBps) half
duplex and 400 MBps full duplex on optical interfaces.


