


10
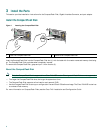
Caution Forcing the DIMM, into the socket can damage the DIMM. Use the notches on the DIMM to align the DIMM in
the DIMM socket before inserting it.
Step 5 Locate the notches and align the DIMM with the socket before inserting it.
Step 6 Gently insert the new DIMM, taking care not to damage the pins on the edge of the DIMM.
Step 7 Press the spring latches to lock the DIMM in place.
Step 8 Replace the cover; lower it onto the chassis and push the cover toward the rear of the chassis to lock it in place.
Step 9 Replace and tighten the four cover screws.
Step 10 Replace the Cisco 7401ASR router in the rack. See the “Rack-Mount the Router” section on page 12 for instructions.
Step 11 Attach the cables and thread them through the cable management bracket if appropriate.
Step 12 Attach the power cables. If you have a DC power supply, attach the –V and +V leads to the power supply. Repeat this
step if you have a dual-DC power supply. Then switch the circuit breaker to the ON position.
Step 13 Power on the router.
For memory specifications and configurations, see the online Cisco 7401ASR Installation and Configuration Guide at
http://www.cisco.com/univercd/cc/td/doc/product/core/7401/7401icg/index.htm.
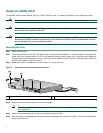
Replace the Port Adapter or Service Adapter
The port adapter or service adapter ships installed. These instructions are provided for future use. Cabling information is
included with the specific port adapter documentation.
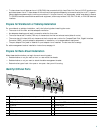
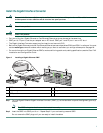
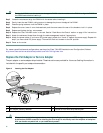
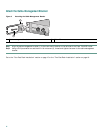
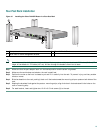
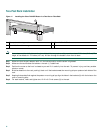
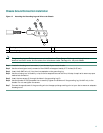
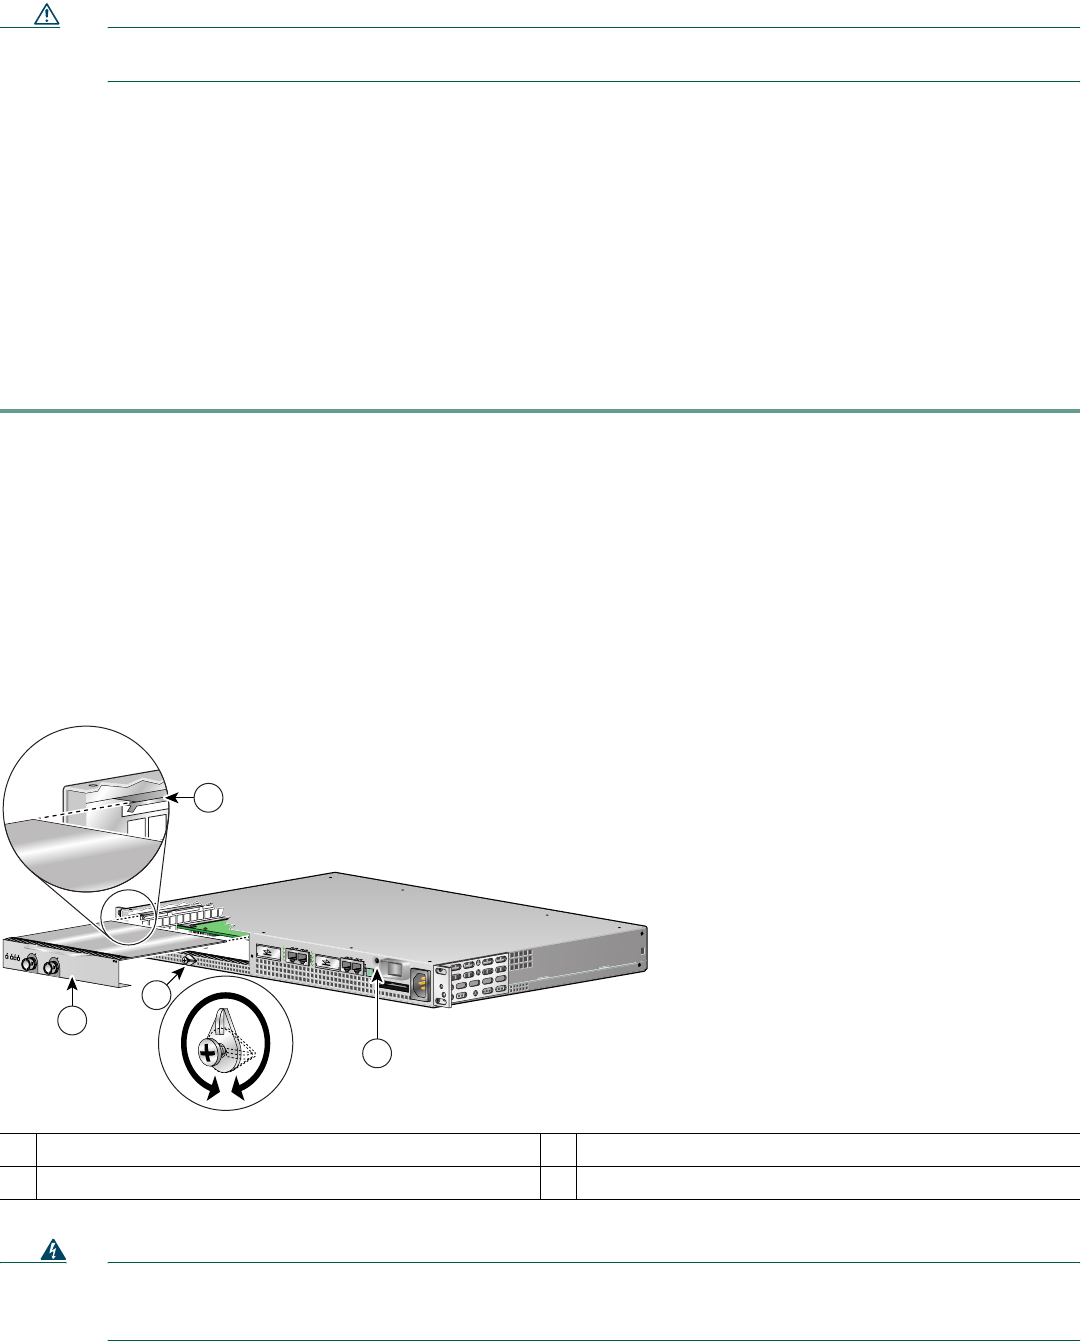
Figure 6 Inserting the Port Adapter
Warning
When performing the following procedures, wear a grounding wrist strap to avoid ESD damage to the card. Some
platforms have an ESD connector for attaching the wrist strap. Do not directly touch the midplane or backplane
with your hand or any metal tool, or you could shock yourself.
1
Port adapter latch
3
Port adapter slot guide
2
Port adapter partially removed
4
Ground for ESD wrist strap banana jack
57579
1
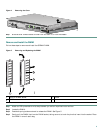
ENABLED
RX CELLS
RX CARRIER
RX ALARM
TX
RX
ENHANCED ATM
2
4
3