


12
4 Rack-Mount the Router
This section provides information for rack-mounting the router.
Attach the Rack-Mount Brackets—Chassis Front-Mounted
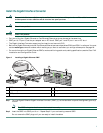
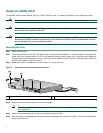
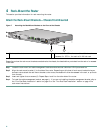
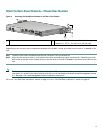
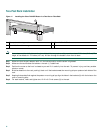
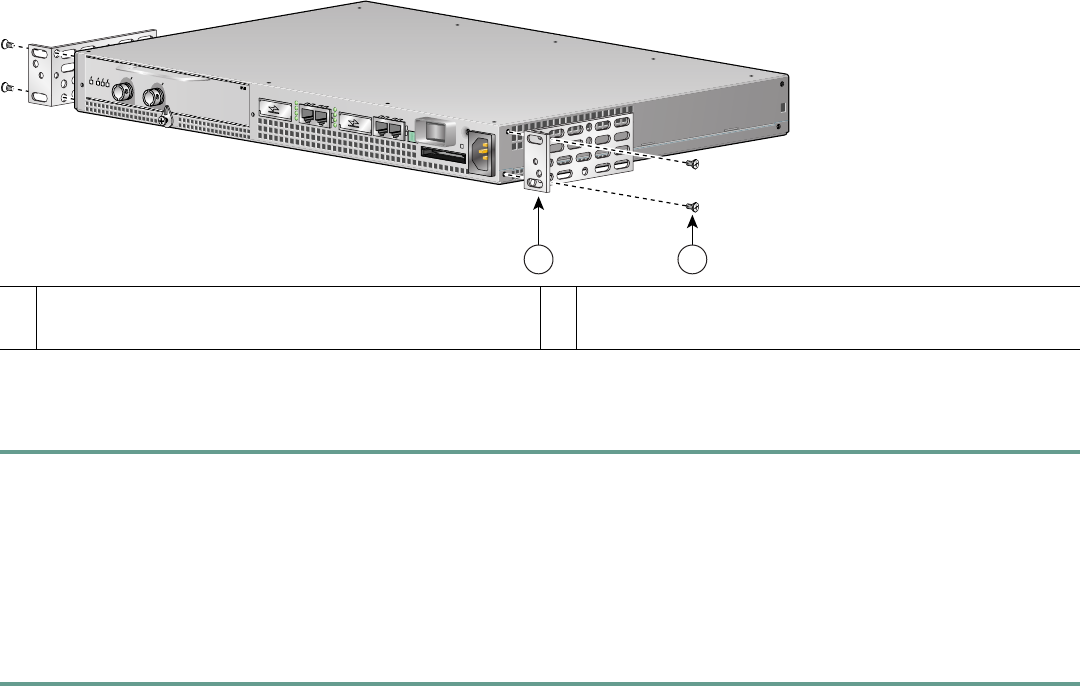
Figure 7 Attaching the Rack-Mount Brackets to the Front of the Chassis
Depending on how the rack-mount brackets are attached to the chassis, the chassis either protrudes from the rack or is recessed
in the rack.
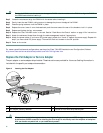
Step 1 Locate the rack-mount and cable-management brackets and screws and a Number 2 Phillips screwdriver.
Step 2 Align the rack-mount bracket (1) to the side of the router. Depending on which set of rack-mount bracket holes you
choose to use to attach the rack-mount bracket to the router, the chassis will either be recessed in the rack, or protrude
from the rack.
Step 3 Insert and tighten the two screws (2). Repeat Steps 1 and 2 on the other side of the router.
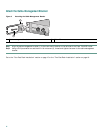
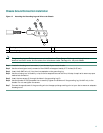
Step 4 To install the cable-management bracket, see page 11. If you are not installing the cable-management bracket, skip to
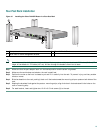
the “Four-Post Rack Installation” section on page 15 or the “Two-Post Rack Installation” section on page 16 for
rack-mount instructions.
1
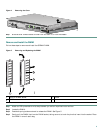
Rack-mount bracket
2
4 screws, 8-18 x .37 in., for use with a 19-inch rack
4 screws, 8 x .375 in., for use in a 21–23-inch rack
ENABLED
RX CELLS
RX CARRIER
RX ALARM
TX
RX
ENHANCED ATM
50531
1 2