


9
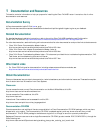
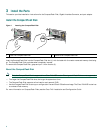
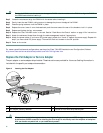
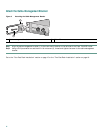
Figure 4 Removing the Cover
Step 7 Slide the cover forward about one-half inch and then lift it from the chassis.
Remove and Install the DIMM
Follow these steps to remove and install the SDRAM DIMM.
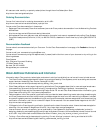
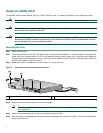
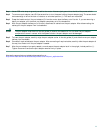
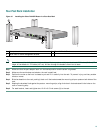
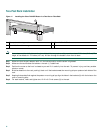
Figure 5 Removing and Replacing the DIMM
Step 1 Attach an ESD-preventative wrist strap between you and an unpainted router surface.
Step 2 Locate the DIMM.
Step 3 Press both spring latches outward to release the DIMM. See Figure 5.
Step 4 Gently pull the DIMM free from the DIMM socket, taking care not to touch the pins that insert into the socket. Place
the DIMM in an anti-static bag.
1
Latch on DIMM socket
3
Notch
2
DIMM
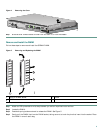
ENABLED
RX CELLS
RX CARRIER
RX ALARM
TX
RX
ENHANCED ATM
66449
6
6284
1
2
3