2-18
Administration Guide for Cisco Virtualization Experience Client 6215 Firmware Release 8.7
Chapter 2 Cisco VXC Manager Configuration Quick Reference
Configure Multimedia Redirection with a Proxy Server
Step 2 In the 6215Configs folder, create an RSP file, for example ProxyConfig.rsp, with the following content
(to create the RSP file, enter the required content in a text editor, and then save the file with a .rsp
extension):
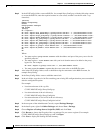
[Version]
Number= ProxyConfig
OS=SLX
Category=Other Packages
USE_Pxe=NO
[Script]
RP "<regroot>"
EX "echo 'export http_proxy=http://<proxy-server.com:443>' >> /etc/bash.bashrc.local"
EX "echo 'export HTTP_PROXY=http://<proxy-server.com:443>' >> /etc/bash.bashrc.local"
EX "echo 'export https_proxy=http://<proxy-server.com:443>' >> /etc/bash.bashrc.local"
EX "echo 'export HTTPS_PROXY=http://<proxy-server.com:443>' >> /etc/bash.bashrc.local"
EX "echo 'export ftp_proxy=http://<proxy-server.com:443>' >> /etc/bash.bashrc.local"
EX "echo 'export FTP_PROXY=http://<proxy-server.com:443>' >> /etc/bash.bashrc.local"
EX "echo 'export all_proxy=http://<proxy-server.com:443>' >> /etc/bash.bashrc.local"
EX "echo 'export all_proxy=http://<proxy-server.com:443>' >> /etc/bash.bashrc.local"
EX "echo 'export no_proxy=<.local-domain.com>' >> /etc/bash.bashrc.local"
EX "echo 'export NO_PROXY=<.local-domain.com>' >> /etc/bash.bashrc.local"
RB
RB
Where:
• You must replace <proxy-server.com:443> with the address and port of the proxy server for the
specified protocols.
• You must replace <.local-domain.com> with your local domain name to be added to the proxy
bypass list. For example:
EX "echo 'export no_proxy=.cisco.com' >> /etc/bash.bashrc.local"
• You must ensure the Number= segment has the exact same value as the RSP file name.
Step 3 Also in the 6215Configs folder, create a subfolder using the same name as the RSP file name, for
example ProxyConfig.
Step 4 In the ProxyConfig folder, create a subfolder named wlx.
Step 5 In the wlx folder, copy the wlx.ini file containing your existing INI configuration that you want retained
after the configuration update.
For example:
• Location and name of the .rsp file:
C:\VXC-M\6215Configs\ ProxyConfig.rsp
• Location and name of the wlx directory:
C:\VXC-M\6215Configs\ ProxyConfig\wlx
• Location and name of wlx.ini file in the wlx directory:
C:\VXC-M\6215Configs\ ProxyConfig\wlx\wlx.ini
Step 6 In the tree pane of the Administrator Console, expand Package Manager.
Step 7 In the details pane, right-click Other Packages and choose New > Package.
Step 8 Choose Register a Package from a Script file (.RSP) and click Next.
Step 9 Click Browse to choose the file path of the .rsp package file you want to register (For example:
C:\VXC-M\6215Configs\ ProxyConfig.rsp) and click Open.
Step 10 Click Next to display the Package Wizard summary.


