


Isys
®
G-Series Touchpanel Interface Crestron TPS-GA-TPI
18 • Isys
®
G-Series Touchpanel Interface: TPS-GA-TPI Operations Guide – DOC. 6501
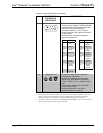
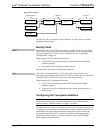
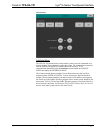
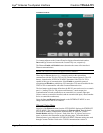
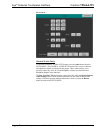
INTERFACE MENU
Two buttons adjacent to the Cresnet ID and its displayed hexadecimal number,
Down and Up, decrease and increase the Cresnet ID by one, respectively.
The Ethernet Enable and Disable buttons determine the status of the interface’s
Ethernet communications.
NOTE: The TPS-GA-TPI does not support wireless Ethernet.
There may be Ethernet devices (i.e., a control system) on the network that
communicate with the TPS-GA-TPI via CIP (Cresnet Internet Protocol). The CIP
buttons, located on the INTERFACE MENU, determine if the TPS-GA-TPI is
capable of this type of communication. Select Enable to permit this protocol
recognition and Disable to prohibit any CIP connection. CIP must be enabled for the
TPS-GA-TPI to communicate with other Crestron Ethernet devices.
The four buttons on the bottom define how the RS-232 port can be used; as a console
port (i.e., loading TPS-GA-TPI projects and firmware), a touch output port
(communication of touch coordinates to an external device), a mouse input port
(allows a mouse to control the interface) and an external touch input ( allows another
device to control the touchscreen)
Select the Save and Return button located on the INTERFACE MENU to save
changes and return to the SETUP MENU.
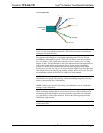
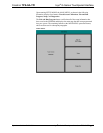
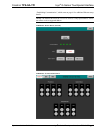
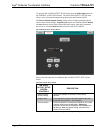
Ethernet Setup Menu
Selection of the Ethernet button from the SETUP MENU displays the ETHERNET
SETUP MENU. This menu provides buttons for Ethernet Status Test (for details
such as the IP Address, Subnet Mask, Default Router, IP Table, etc.), DHCP
Enable/Disable and Static IP Options. Each of the Static IP Options has its own
menu, as shown in the illustrations on the following pages. The enable/disable
Ethernet feature is provided on the INTERFACE MENU. Ethernet settings are made
through Crestron Toolbox. Refer to the TCP/IP Communications section of