


Back to Contents Page
Dell™Optiplex™960MiniTower/Desktop/SmallFormFactorServiceManual
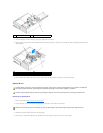
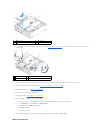
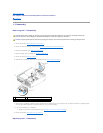
I/O Assembly
I/O Assembly
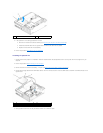
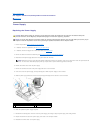
Removing the I/O Assembly
1. Perform the procedure Before Working on Your Computer.
2. Remove the hard drive and shroud assembly (see Removing the Hard Drive and Shroud Assembly).
3. Remove the optical drive (see Removing an Optical Drive).
4. Remove the floppy drive, if installed (see Removing a Floppy Drive).
5. Remove the bezel (see Remove the Bezel).
6. Disconnect the I/O assembly cables from the system board (see System Board Components).
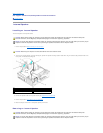
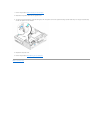
7. Gently pull the I/O assembly release tab forward, and slide the I/O assembly to the right to release it from it's locator slot. Move the I/O assembly away
from front panel while guiding the I/O assembly cables out of the front of the chassis.
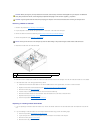
8. If you are not replacing the I/O assembly:
a. Replace the hard drive and shroud assembly (see Replacing the Hard Drive and Shroud Assembly).
9. Perform the procedure After Working on Your Computer.
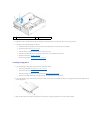
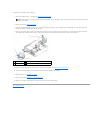
Replacing the I/O Assembly
CAUTION: Before working inside your computer, read the safety information that shipped with your computer. For additional safety best
practices information, see the Regulatory Compliance Homepage at www.dell.com/regulatory_compliance.
CAUTION: To guard against electrical shock, always unplug your computer from the electrical outlet before removing the computer cover.
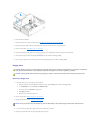
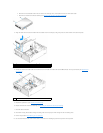
1
I/O assembly
2
I/O assembly cables/connectors
3
locking tab