


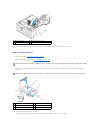


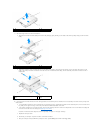
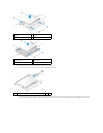


7. If the drive being removed is a 2.5-inch hard drive:
a. Remove the 2.5-inch hard drive caddy from the drive bay caddy by gently bending out the sides of the drive bay caddy lifting out the hard drive
caddy.
b. Detach the hard drive to be removed from the 2.5-inch hard drive caddy by removing the four screws, two on each side, that secure it to the
caddy. The primary hard drive is mounted on the flat side of the 2.5-inch hard drive caddy, and the secondary hard drive is mounted on the U-
shaped side.
8. If a primary hard drive was removed and is not being replaced, and a secondary drive is installed, move the secondary hard drive into the primary hard
drive position:
a. If the secondary hard drive is a 3.5-inch hard drive (in the lower drive bay), disconnect the cables from the secondary drive, move the lower drive
bay caddy to the upper drive bay, connect the power cable and SATA0 data cable to the drive.
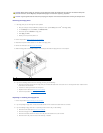
b. If the primary hard drive is a 2.5-inch hard drive, unmount the secondary hard drive from the U-shaped side of the 2.5-inch hard drive caddy and
remount it on the flat side of the caddy (see Replacing a Hard Drive).
Install the 2.5-inch hard drive caddy into the drive bay caddy, and place it in the upper drive bay.
c. Replace the computer cover.
d. Reconnect your computer to power and other I/O devices as needed.
e. Boot your computer and press F2 when prompted to enter system Setup (see the Dell
™
Technology Guide).
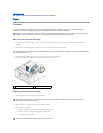
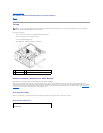
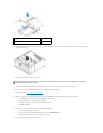
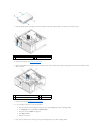
1
hard drive or 2.5-inch hard drive caddy
2
drive bay caddy
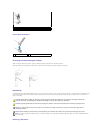
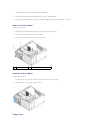
1
hard drive or 2.5-inch hard drive caddy
2
drive bay caddy
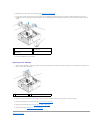
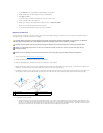
1
2.5-inch hard drive mounted as the primary
drive
2
2.5-inch hard drive
caddy