


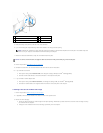


Internal Wireless Card - Installation
The internal wireless card is an optional device.
To install the card, do the following:
1. Perform the procedure Before Working on Your Computer.
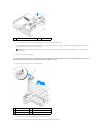
2. If installed, remove the filler plug covering the opening in the back panel for the Wi-Fi external antenna connector.
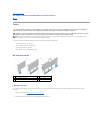
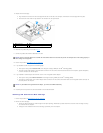
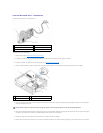
3. Locate the wireless card connector on the system board (see System Board Components).
4. Position the wireless card connector directly above the system board connector with cable edge of the card toward the back of the chassis.
5. Insert the wireless card connector into the system board connector until the card retention clasp catches the metal loop on the side of the chassis and
holds the card securely in place.
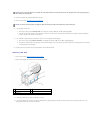
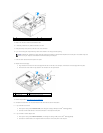
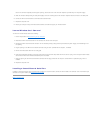
6. Route the wireless card cable through the cable guides on the top of the heatsink assembly and along the cable bundle for the front panel wiring. Store
and secure excess cable on the side of the heatsink assembly near the back of the front panel.
7. Remove the plug on the back panel where the connector for the Wi-FI antenna is installed.
8. Position the external antenna connector at the end of the wireless card cable in the antenna connector opening in the back panel so that the retaining
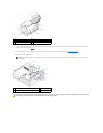
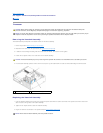
1
wireless card assembly
2
wireless card cable to antenna
3
Wi-Fi external antenna connector
4
card retention clasp release
5
card retention clasp
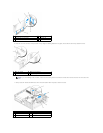
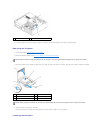
1
wireless card cable
2
Wi-Fi external antenna connector
3
wireless card assembly
4
wireless card connector
NOTICE: When routing the wireless card cable through the chassis, avoid making sharp bends. This can cause signal degradation.