


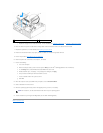

j. Replace the floppy drive or media card reader, if it was installed (see Installing a Floppy Drive, or Installing a Media Card Reader).
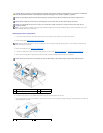
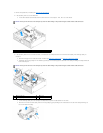
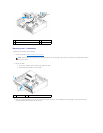
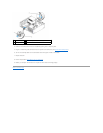
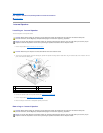
6. Route the hard drive power and data cables through cable channels and attach them to the cable bundle as needed.
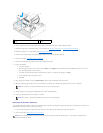
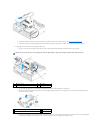
7. Replace the optical drive, if it was installed (see Installing an Optical Drive).
8. Ensure that all cable connectors are properly seated and cables are routed through cable channels.
9. Perform the procedure After Working on Your Computer.
10. Reconnect power and I/O devices to the computer, as needed.
11. Perform the following:
a. Turn on the computer.
b. When the computer boots, press F2 to enter system Setup (see the Dell
™
Technology Guide for more information).
c. In the Settings menu, select Drives, and select Drives in the sub- menu.
d. Enable the SATA1 port, if necessary. If any settings were changed, click Apply.
e. Verify the that the SATA port information shown is correct.
f. Insert a bootable medium into your boot drive.
g. Click Exit.
12. When the computer starts, press F12 when prompted to enter the Boot Drive Menu.
13. Select a bootable drive and continue.
14. When the operating system loads, partition and logically format your drive, if necessary.
15. Test the hard drive by running the Dell Diagnostics (see the Dell
™
Technology Guide).
Back to Contents Page
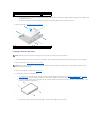
1
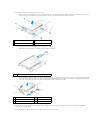
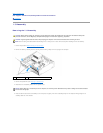
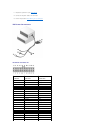
2.5-inch hard drive caddy in drive bay caddy
2
slot verification number
NOTE: For instructions, see the documentation that came with your operating system.