


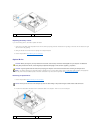
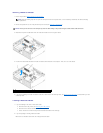
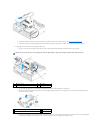


3. If installing 2.5-inch hard drives as the primary hard drive:
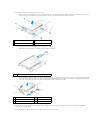
a. Position the new 2.5-inch hard drive into the flat side of the 2.5-inch hard drive caddy with the side of the drive with the label plate facing away
from the caddy, and the connector end of the drive toward the end of the caddy with the cable cutout (back end).
b. Secure the drive to the drive caddy with four screws, two on each side.
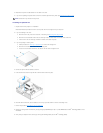
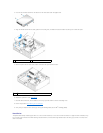
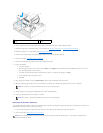
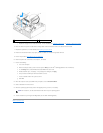
c. Attach the power cable adapter to the hard drive(s) installed in the caddy.
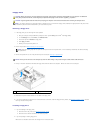
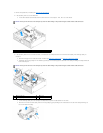
d. Install the 2.5-inch hard drive caddy into the drive bay caddy by gently bending out the release tabs on the side of the caddy and positioning the
2.5-inch hard drive caddy in the drive bay caddy. The pins inside the drive bay caddy should align with the holes on the sides of the 2.5-inch hard
drive caddy, and the connector end of the hard drive should face the back of the drive bay caddy.
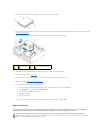
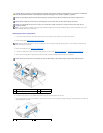
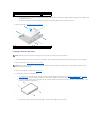
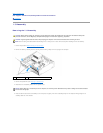
4. Connect the power and data cables to the drive(s). When installing the primary hard drive, ensure that the data cable is attached to the SATA0
connector on the system board.
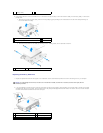
5. Lower the drive bay caddy into the drive bay and slide it forward until it clicks into place.
1
2.5-inch hard drive caddy, flat side
up
2
2.5-inch hard drive, connector
end
3
cable cutout
4
screws (4)
1
power cable adapter
1
2.5" hard drive caddy
2
2.5" hard drive
3
release tabs (2)
4
drive bay caddy
5
drive bay caddy front