


Replacing Drive Bay Inserts
If you are removing a drive, and need to replace the inserts:
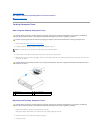
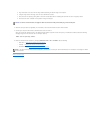
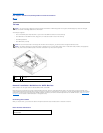
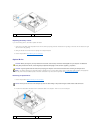
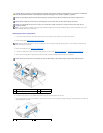
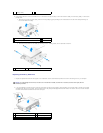
1. At the front of the bezel, place the plastic insert over the drive bay opening and insert the tabs at the right edge of the insert into the slots at the right
side of the drive bay opening.
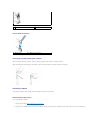
2. Swing the left side of the insert into the opening until it snaps into place.
3. Perform the procedure After Working on Your Computer.
Optical Drive
Removing an Optical Drive
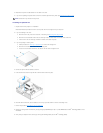
1. Perform the procedure Before Working on Your Computer.
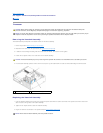
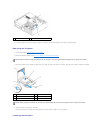
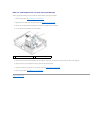
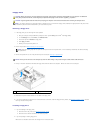
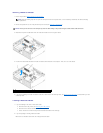
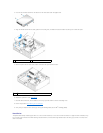
2. Lift the drive-release latch and slide the drive towards the back of the computer. Then lift it out of the computer.
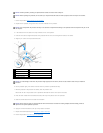
1
retention tab
2
drive bay insert
CAUTION: Before you begin any of the procedures in this section, read the safety information that shipped with your computer. For additional
safety best practices information, see the Regulatory Compliance Homepage at www.dell.com/regulatory_compliance.
CAUTION: To guard against electrical shock, always unplug your computer from the electrical outlet before removing the computer cover.
NOTE: If you will be operating your computer without an optical drive or a 3.5-inch device (floppy drive or media card reader) installed, the appropriate
drive bay insert must be installed in place of the drive. Contact Dell if you need a drive bay insert. See Removing Drive Bay Inserts.
NOTICE: Do not pull the drive out of the computer by the drive cables. Doing so may cause damage to cables and the cable connectors.
1
drive release latch
2
optical drive