


To replace the I/O assembly, do the following:
1. Remove the computer cover, if installed (see System Board Components).
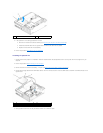
2. Remove the bezel (see Remove the Bezel).
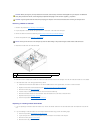
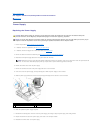
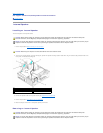
3. Feed the I/O assembly cables into the front of the chassis through the opening for the I/O assembly until the assembly is in place. Ensure that the
securing tab points toward the right (toward the grill).
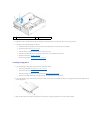
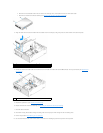
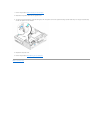
4. With the I/O connector block in flush to the front panel, shift it to the right, then shift it to the left and push it in until it snaps into place. Notice that
when shifting the connector block to the left, a tang on the left end of the connector block will slide into a slot in the front panel.
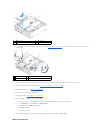
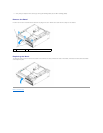
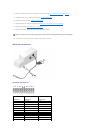
5. Plug the I/O assembly cable connectors into their system board connectors (see System Board Components).
6. Join the I/O assembly cables to the cable bundle routed through the middle of the chassis.
7. Replace the bezel (see Replacing the Bezel).
8. Perform the procedure After Working on Your Computer.
9. Reboot your computer and exercise the I/O panel to ensure that it is working properly.
Back to Contents Page
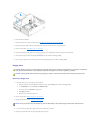
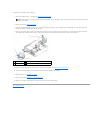
NOTE: Use the guides on the I/O assembly bracket to help position the I/O assembly in place, and use the notch on the I/O assembly bracket to
help seat the panel.
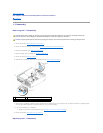
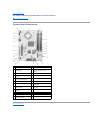
1
I/O assembly
2
I/O assembly cables, connectors (2)
3
securing tab