


`
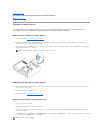
4. If previously cables were routed through the guides on the back of the heatsink assembly, reroute them through the guides.
Removing the Processor
1. Perform the procedure Before Working on Your Computer.
2. Remove the heatsink assembly (see Remove and Replace the Fan and Shroud Assembly).
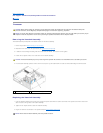
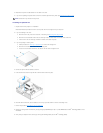
3. Open the processor cover by sliding the release lever from under the center cover latch on the socket. Then pull the lever back to release the processor.
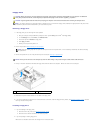
4. Gently remove the processor from the socket.
Leave the release lever extended in the release position so that the socket is ready for the new processor.
Installing the Processor
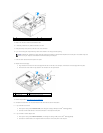
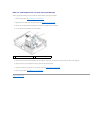
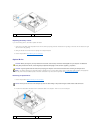
1
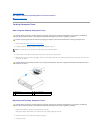
heatsink assembly
2
captive screw housing (4)
NOTICE: Unless a different heatsink is required for the new processor, reuse the original heatsink assembly when you replace the processor.
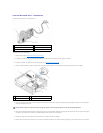
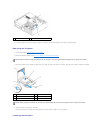
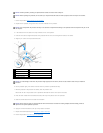
1
center cover latch
4
socket
2
processor cover
5
release lever
3
processor
NOTICE: When replacing the processor, do not touch any of the pins inside the socket or allow any objects to fall on the pins in the socket.