


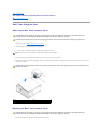


The drive to be removed may be a 3.5-inch hard drive installed in the upper drive bay or lower drive bay, or 2.5-inch hard drive in the upper bay, and may be a
primary drive or secondary drive.
The upper drive bay always contains the primary hard drive, and, if a drive is installed in the lower drive bay, it is always configured as a secondary hard drive.
When two 2.5-inch hard drives are installed in the system (as primary and secondary drives), both are mounted on the same 2.5-inch hard drive caddy and it
is installed in the upper drive bay.
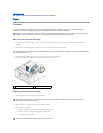
1. If you are removing a hard drive that contains data you want to keep, back up your files before you begin this procedure.
2. Perform the procedure Before Working on Your Computer.
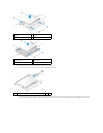
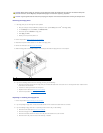
3. Disconnect the power cables from the drive(s) in the bay holding the drive being removed. If removing a 2.5-inch hard drive, disconnect the power cable
from the power cable adapter.
4. Disconnect the data cable(s) from the hard drive(s) in the in bay the containing the drive being removed.
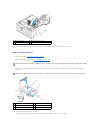
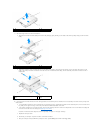
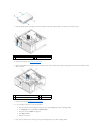
5. Remove the drive bay caddy holding of the drive by pressing in the blue release tabs on each side of the caddy and sliding the caddy up and out of the
computer.
6. If the drive being removed is a 3.5-inch hard drive, remove it from the drive bay caddy by gently bending out the sides of the drive bay caddy to free the
drive.
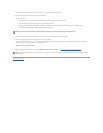
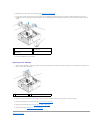
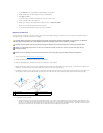
1
data cable
2
hard drive system board connector
3
power cable
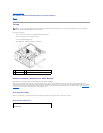
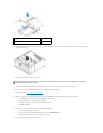
1
hard drive(s)
2
release tabs (2)