


Removing and Replacing Parts: Dell Inspiron 4100
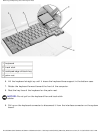
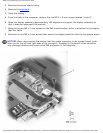
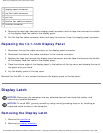
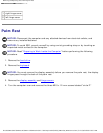
1 display panel connector
2 top flex-cable connector
3 pull tab
4 bottom flex cable connector
5 inverter connector
9. Remove the tape that secures the display panel connector and the tape that secures the middle
of the display-feed flex cable to the display panel.
10. Pull the top flex-cable connector down and away to remove it from the display panel connector.
Replacing the 14.1-Inch Display Panel
1. Reconnect the top flex-cable connector to the display panel connector.
2. Reconnect the bottom flex-cable connector to the inverter connector.
3. Replace the tape that secures the display panel connector and the tape that secures the middle
of the display-feed flex cable to the display panel.
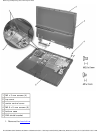
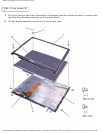
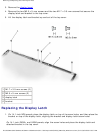
4. Place the bottom edge of the display panel in the bottom of the top cover and elevate the top of
the panel with your hand.
5. Lay the display panel in the top cover.
Reinstall the five M2 x 4-mm screws that secure the display panel to the top cover.
Display Latch
NOTICE: Disconnect the computer and any attached devices from electrical outlets, and
remove any installed batteries.
NOTICE: To avoid ESD, ground yourself by using a wrist grounding strap or by touching an
unpainted metal surface on the computer.
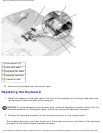
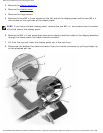
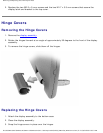
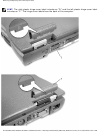
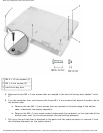
Removing the Display Latch
1. Remove the hard drive.
2. Remove the display assembly.
file:///I|/SERVICE%20MANUALS/DELL%20MANUALS/LA...20ok/Inspiron/4100/4100_SERVICE_MAN/remove.htm (29 of 52)6/21/2004 1:02:31 AM