


31
Using the Configuration Menu (continued)
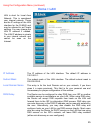
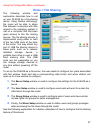
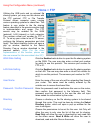
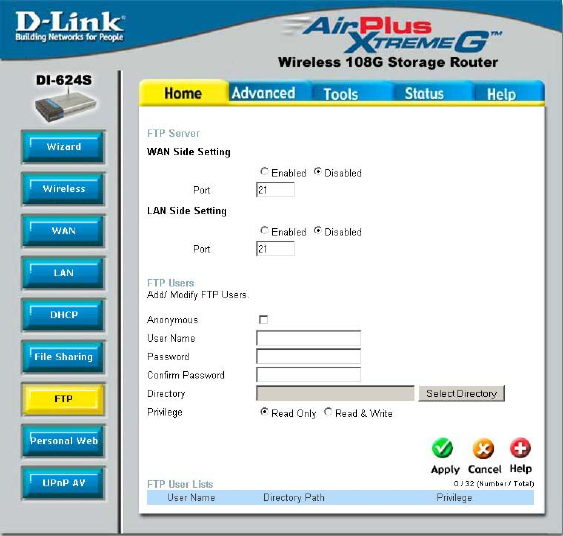
Home > FTP
WAN Side Setting
Click the Enabled radio button to open the file sharing system
on the WAN. The user may also enter a virtual port number
for which to use this protocol. The common port number for
FTP is 21.
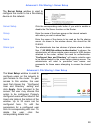
LAN Side Setting Click the Enabled radio button to open the file sharing system
on the LAN. The user may also enter a virtual Port number for
which to use this protocol. The common port number for FTP
is 21.
User Name Enter the name of the user who will be uploading files through
your router. This name must be exactly entered by the
outside user to access the shared files.
Password / Confirm Password
Enter the password used to authorize this user on the router,
then confirm that password in the following field. This
password must be identical to the one the user will input
when asked for authorization by the router.
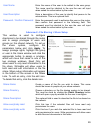
Directory Choose a directory on the file sharing system to be shared
through this router. This must be done by clicking the Select
Directory button, which will open a pop up window for the
user to configure.
Privilege Choose the permissions to be set for the user. List Only will
allow the user to only view the list of files set for sharing.
Read Only
will allow the user to download but only read files
on the share server. Read & Write will allow the user to
download, read and alter files on the server.
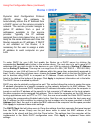
Utilizing the USB ports and an external file
sharing system, you may use this device with
the FTP protocol. FTP or File Transfer
Protocol allows computer users running
various operating systems to share files. This
feature is very similar to the file sharing
feature described in the previous section both
in implementation and usage. The FTP
service may be enabled for the WAN
(external), LAN (internal) or both networks.
The common virtual port number for FTP is
21. To set up your router to be a FTP server,
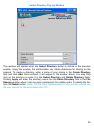
configure the following parameters and click
Apply. The Select directory button will open a
pop up window, identical to the Select
Directory Pop-up window described in the
previous section.
(Note: For the client
implementation of this function, please see
the user manual for the associated client PC)