Chapter 3: Using the Internet and Faxing
26
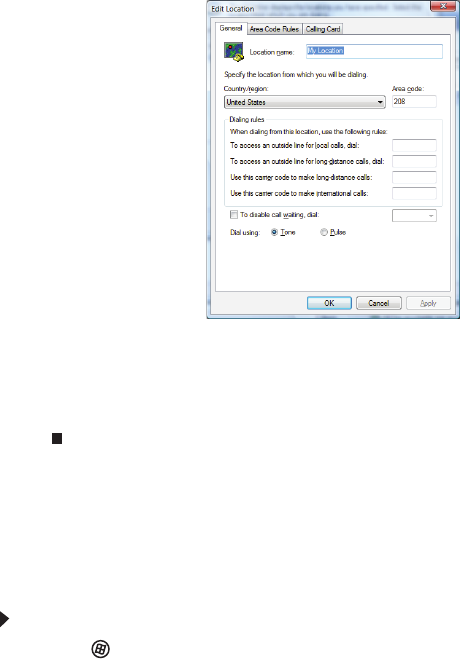
11 Highlight your location, then click Edit. The Edit Location dialog box opens.
12 Complete the location information, then click OK. You are returned to the Dialing Rules dialog
box.
13 Click OK. The New Fax dialog box opens.
14 Enter, scan, or attach the fax information you want to send, then click Send.
Setting up your cover page template
You can create your own cover page template that you can use in place of the cover page templates
that Windows Fax and Scan provides for you. To create a cover page template, you use the Fax
Cover Page Editor. On this template, you insert information fields that automatically import values
you enter in both the Send Fax Wizard and the Fax Configuration Wizard when you send your fax.
To set up your fax cover page template:
1 Click (Start), All Programs, then click Windows Fax and Scan. Windows Fax and Scan
opens.
2 If Windows Fax and Scan is in Scan view, click Fax in the lower left corner of the window.


