Chapter 6: Protecting your computer
64
4 Click:
• Install Updates to download and install updates on your computer. These updates
include security updates.
• Install Extras to download additional Windows software for your computer.
Scheduling automatic updates
Use the Windows Security Center to schedule automatic updates. Windows can routinely check for
the latest updates for your computer and install them automatically.
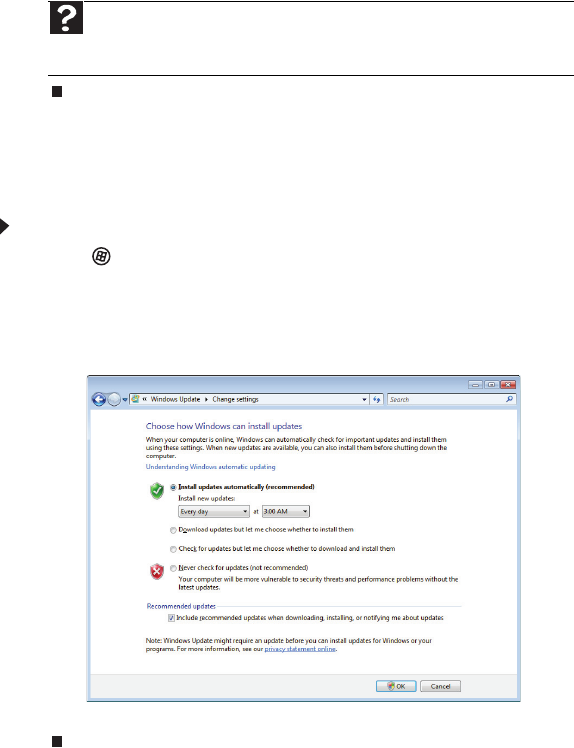
To schedule automatic updates:
1 Click (Start), Control Panel, then click Security.
2 Click Security Center. The Windows Security Center dialog box opens.
3 Click Windows Update.
4 Click Change Settings. The Change Settings dialog box opens.
5 Make your changes to the schedule settings, then click OK.
BigFix
Your computer may include BigFix. BigFix monitors your computer for problems and conflicts. It
automatically gathers information about the latest bugs, security alerts, and updates from BigFix
sites on the Internet. Whenever BigFix detects a problem, it alerts you by flashing the blue taskbar
icon. To fix the problem, click on that icon to open BigFix.
Help
For more information about Windows Update, click Start, then
click Help and Support. Type Windows update in the Search box, then press
E
NTER.
