


64
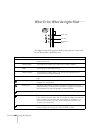
Fine-tuning the Projector
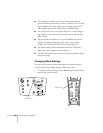
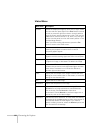
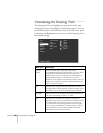
Video Menu
Menu item Description
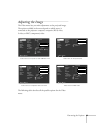
Position Moves the displayed image up, down, left, or right. Select
this item and then press right on the
Enter
button (remote
control) or press the right arrow button (control panel) to
enter the screen position adjustment mode. Then use the
Enter
button (remote control) or up, down, left, and right
buttons (control panel) to move the screen position in the
corresponding direction.
When you finish making adjustments, press the
Esc
button to return to the Video menu.
Tracking Removes vertical lines from the computer image by
matching the projector’s internal clock to various
computer graphic signals.
Sync Corrects fuzziness or screen flicker by synchronizing the
projector with the tracking signal sent from the computer.
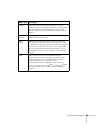
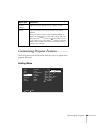
Brightness Lightens or darkens the overall image. Increase brightness
to lighten an image, or decrease it to darken the image.
Contrast Adjusts the difference between light and dark areas.
Increase the contrast to make light areas lighter and dark
areas darker. Decrease it to minimize the difference
between light and dark areas.
Color Adjusts the color depth of the image. Increase the color
setting for more intense color on the screen, or lower the
setting for less intense color.
Tint Adjusts the tint of the image.
Sharpness Adjusts the sharpness of the image.
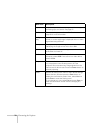
Gamma Adjusts the vividness of colors in the image. Choose
Dynamic
for an image with distinct color differences,
such as charts. Choose
Normal
to leave tints
uncorrected. Choose
Natural
to produce images with a
natural tint, such as for video images.
Resolution Specifies the input resolution. In most cases, this setting
should be left at the
Auto
setting to allow the projector to
automatically detect the video signal. If you want to
specify a setting, however, select the
Manual
option and
then choose from 32 settings.